Documentation
HarmonyOS USB edition install
On this page
- 1. When to use
- 2. What you install
- 3. Before you start
- 4. Install on the PC
- Step 1: Select products
- Step 2: Check components
- Step 3: Confirm install folder
- Step 4: Wait for download
- Step 5: Finish install
- 5. Center + USB license (required)
- Step 6: Run the center
- Step 7: Sign in and USB-connect the phone
- Step 8: Bind “USB device license”
- 6. Connect iEasyRun and scan devices
- Step 9: Run iEasyRun
- Step 10: Sign in to the workstation
- Step 11: Open Devices and scan
- Step 12: Add the device to the list
- Step 13: Configure a model
- Step 14: Create a chat and pick HarmonyOS
- Step 15: Refine the request
- Step 16: Run directly
- Step 17: Check the result
- 7. Acceptance checklist
- FAQ
- Related
TL;DR
Downloader → HarmonyOS Next + AI Workstation → install HarmonyOS Next center + iEasyRun → run 新中控.exe, USB-connect the phone and bind a USB device license → scan HarmonyOS USB in the workstation → add a model and chat-drive the phone.
1. When to use
- HarmonyOS (HarmonyOS Next) phone on a USB cable to a Windows PC
- Need the HarmonyOS Next center to see the phone, then use iEasyRun for chat / workflows / MCP
- Same “USB cable” shape as iOS USB edition, but different packages—do not copy the iOS checklist
2. What you install
| Component | Role |
|---|---|
HarmonyOS Next center (新中控.exe) |
USB discovery, screen cast, license binding |
| iEasyRun Mobile Automation AI Workstation | Chat, workflows, MCP |
| VC runtime (as needed) | If the center status bar stays red—install VC libs and reboot |
3. Before you start
- Windows PC online; a working USB cable
- Enable Developer Mode on the phone; when asked to trust debugging, choose Always trust
- Turn off protection first: antivirus, Windows Security real-time protection, and temporarily the firewall
Downloader: https://ieasyclick.com/downloader
4. Install on the PC
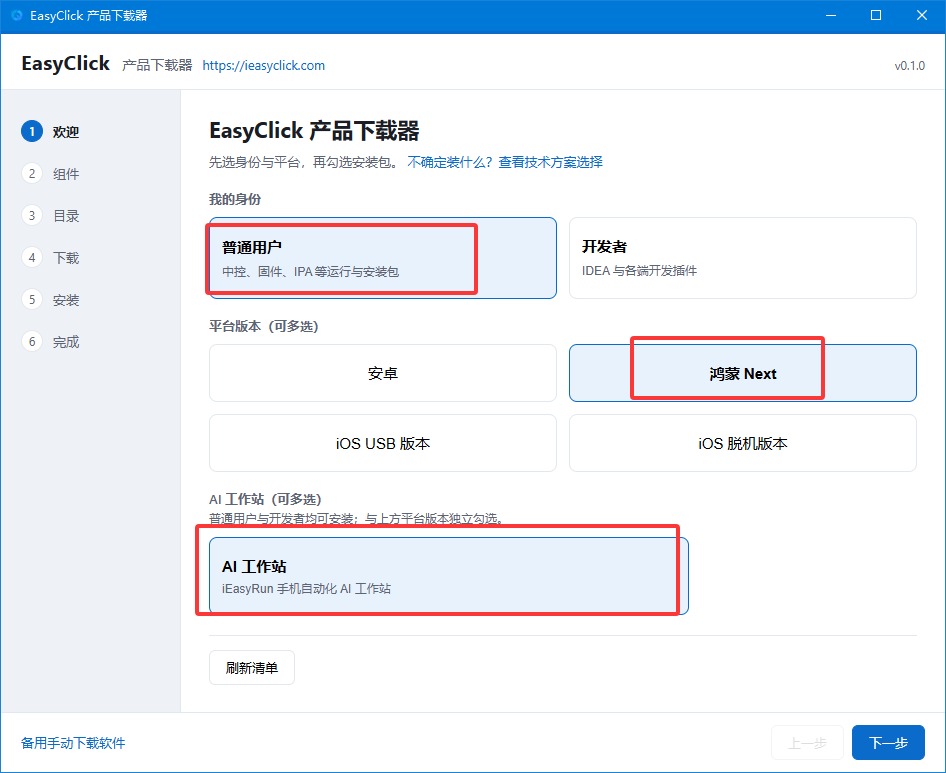
Step 1: Select products
Run the downloader and on the welcome page choose:
- Identity: Ordinary user
- Platform: HarmonyOS Next
- AI Workstation: AI Workstation
Click Next.
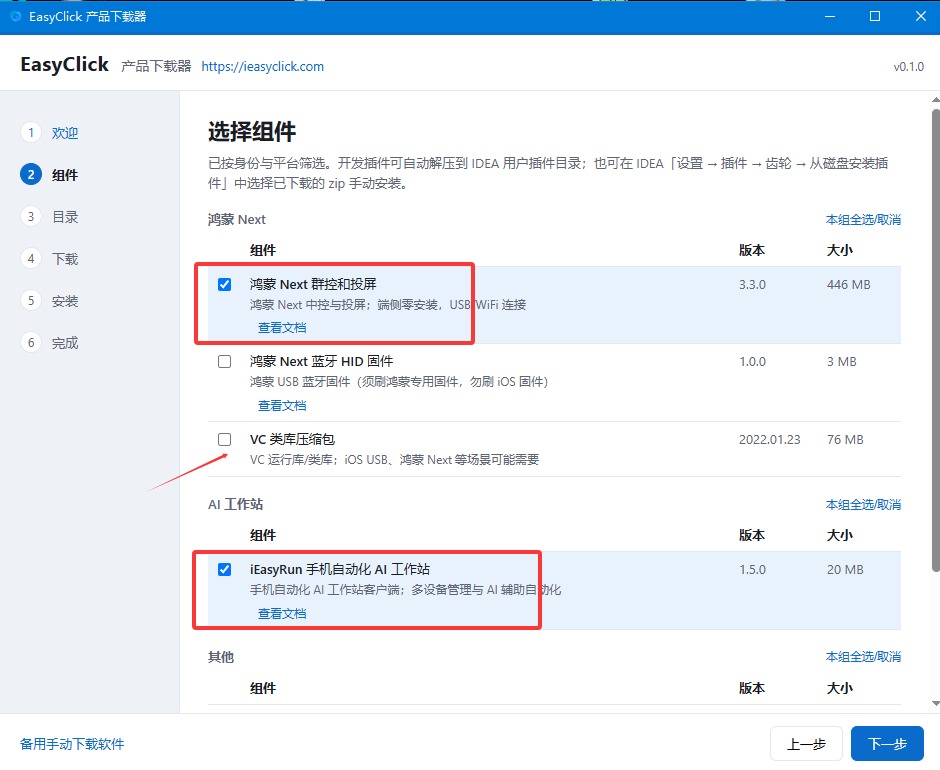
Step 2: Check components
Check these two:
- HarmonyOS Next center / casting
- iEasyRun Mobile Automation AI Workstation
Then click Next.
Note
If later the center status bar stays red, install VC libraries via the downloader, then reboot and reopen the center.
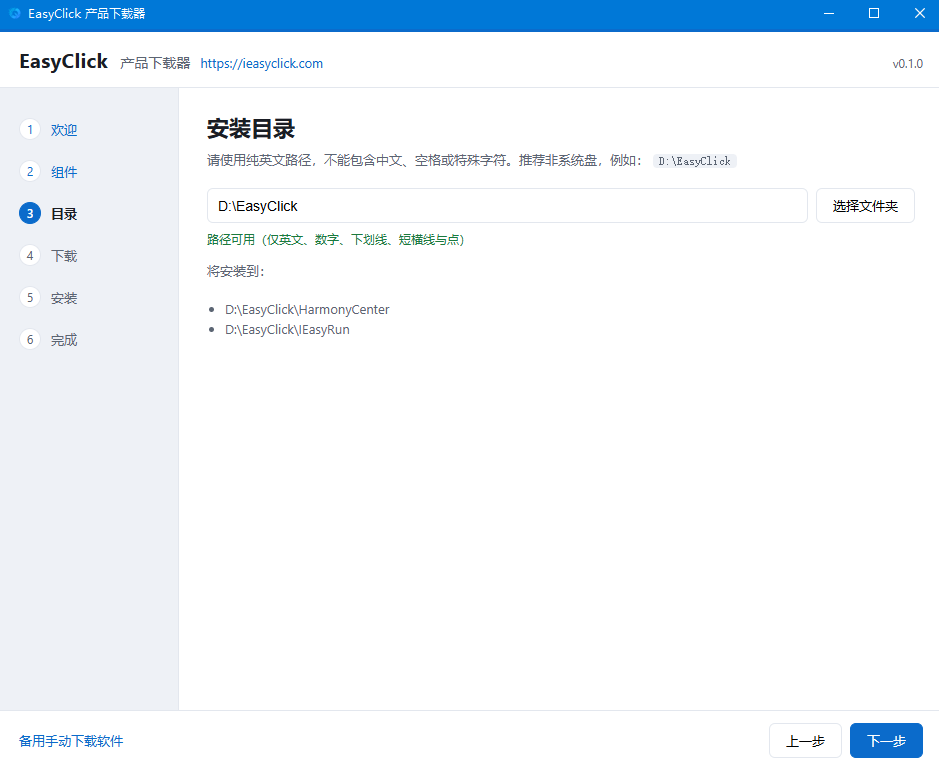
Step 3: Confirm install folder
The default path is fine—confirm and continue.
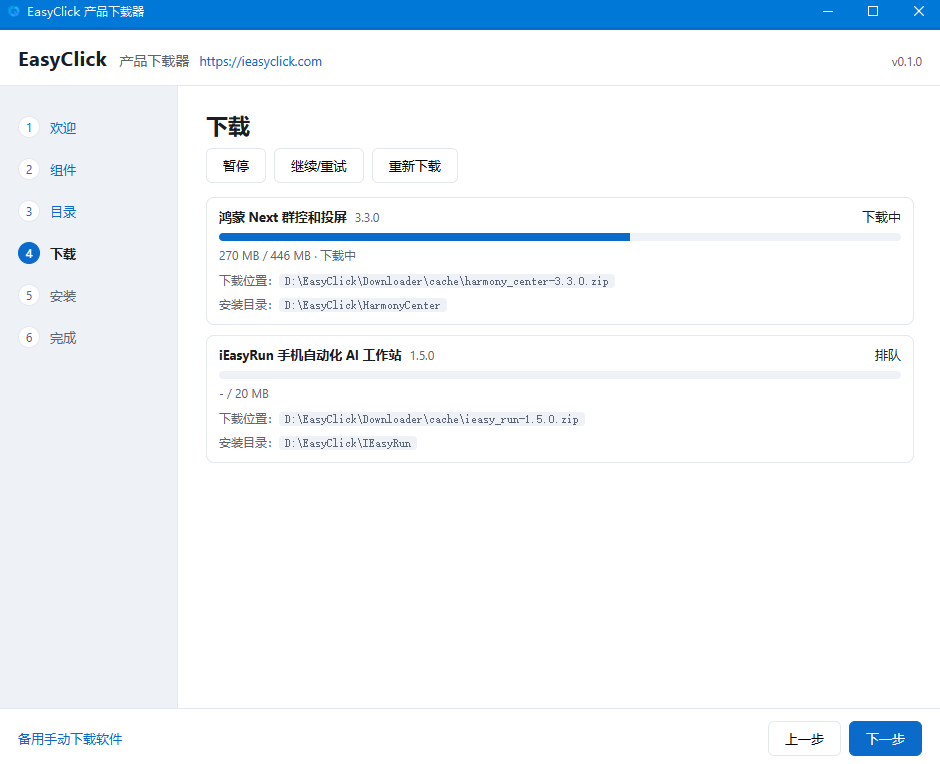
Step 4: Wait for download
Keep the network stable until batch download finishes, then click Next.
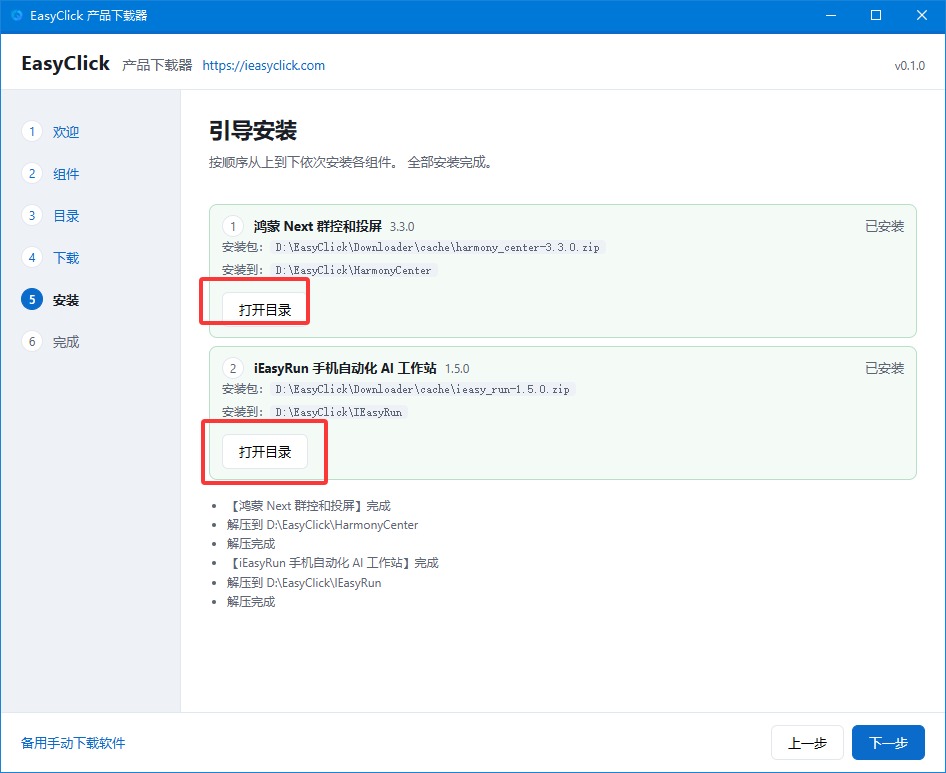
Step 5: Finish install
Follow on-screen install. Use Open folder to see where each product was installed.
5. Center + USB license (required)
AI phone control needs a USB device license bound in the HarmonyOS center.
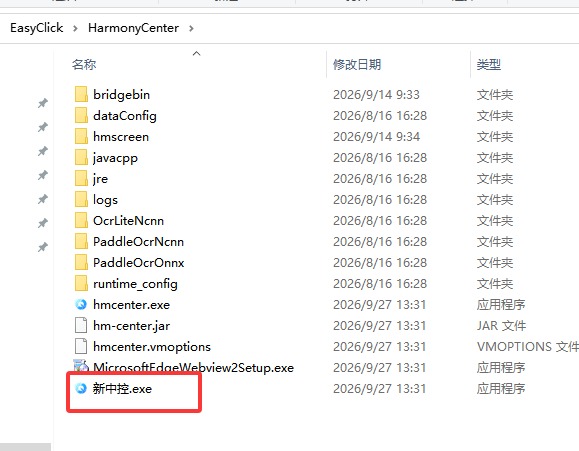
Step 6: Run the center
Open the HarmonyOS center install folder and double-click 新中控.exe.
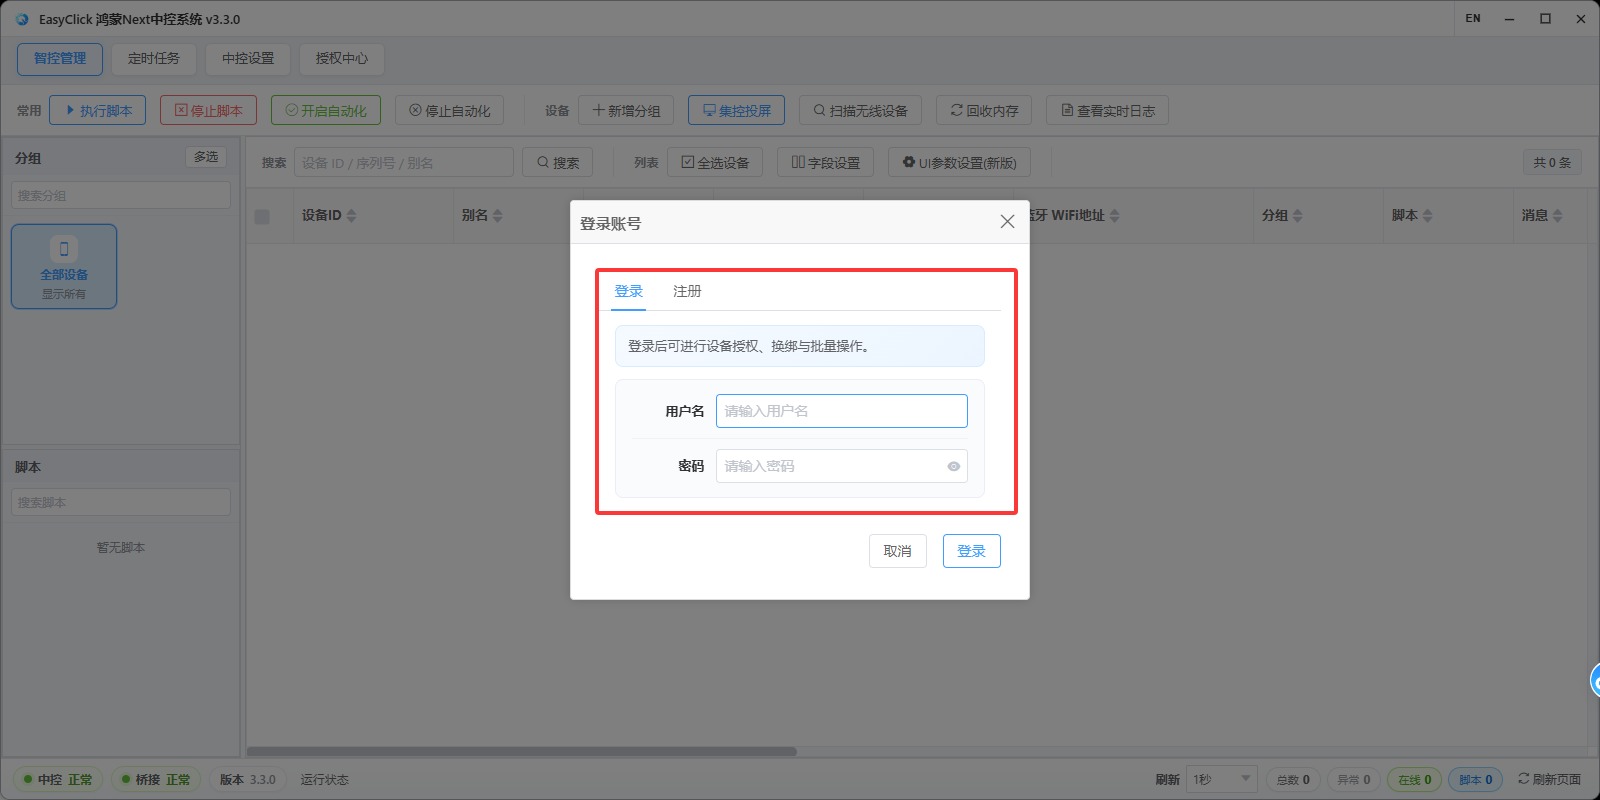
Step 7: Sign in and USB-connect the phone
- No account: register
- Existing EasyClick (iOS / HarmonyOS) or iEasyRun account: sign in (accounts are shared)
- USB-connect the phone; enable Developer Mode; choose Always trust when prompted
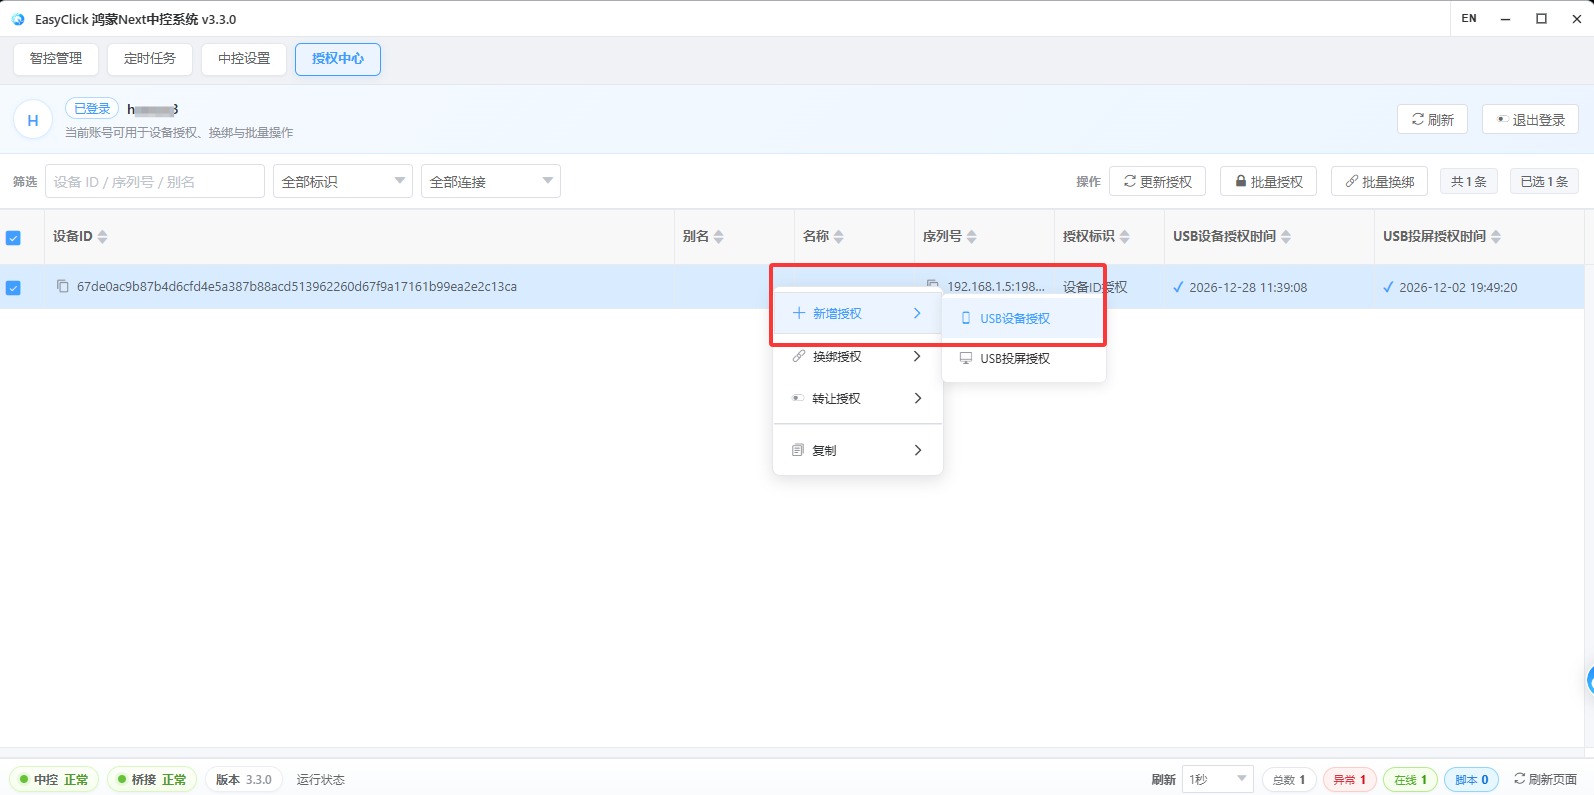
Step 8: Bind “USB device license”
Open License Center, purchase a license from official/reseller channels, bind type USB device license (not another type), then confirm.
6. Connect iEasyRun and scan devices
Step 9: Run iEasyRun
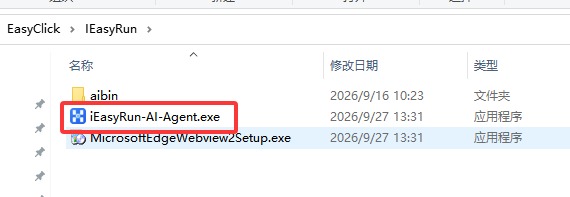
Open the iEasyRun folder and double-click iEasyRun-AI-Agent.exe. If it won’t start, install MicrosoftEdgeWebview2Setup.exe in the same folder first.
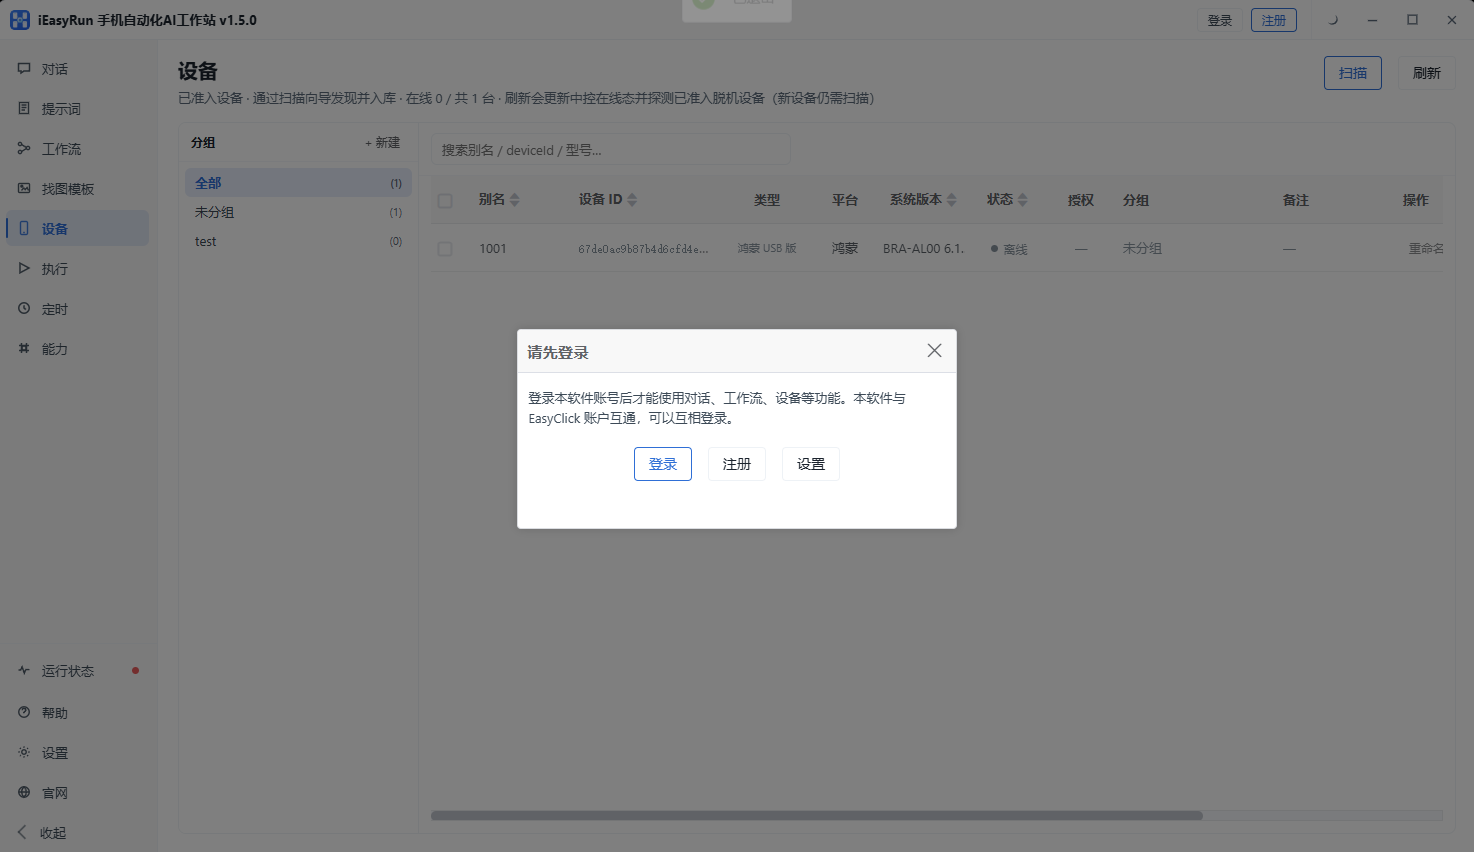
Step 10: Sign in to the workstation
Register if needed, or sign in. EasyClick iOS / HarmonyOS accounts work too.
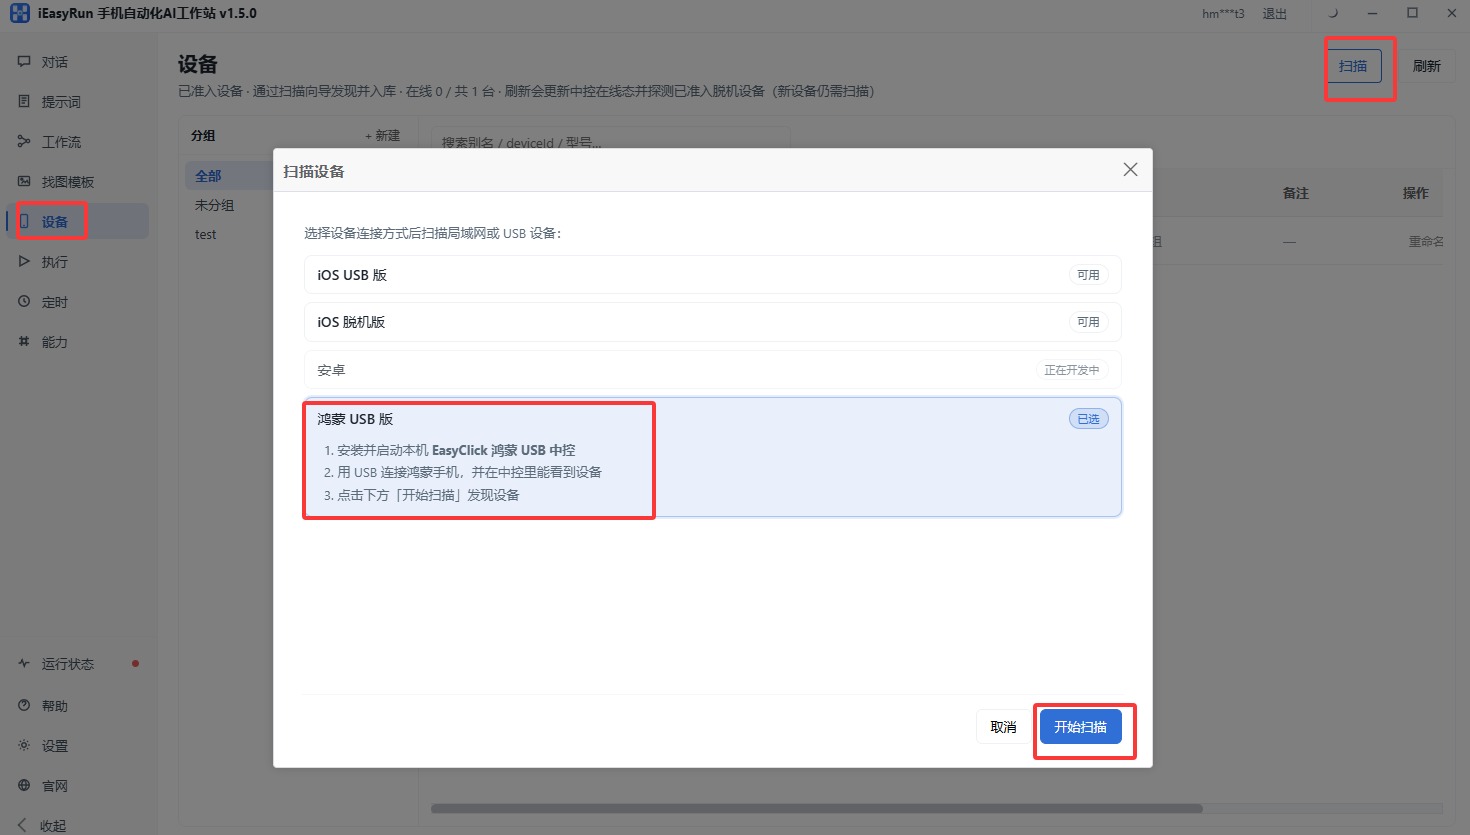
Step 11: Open Devices and scan
Go to Devices, click Scan, and choose HarmonyOS USB.
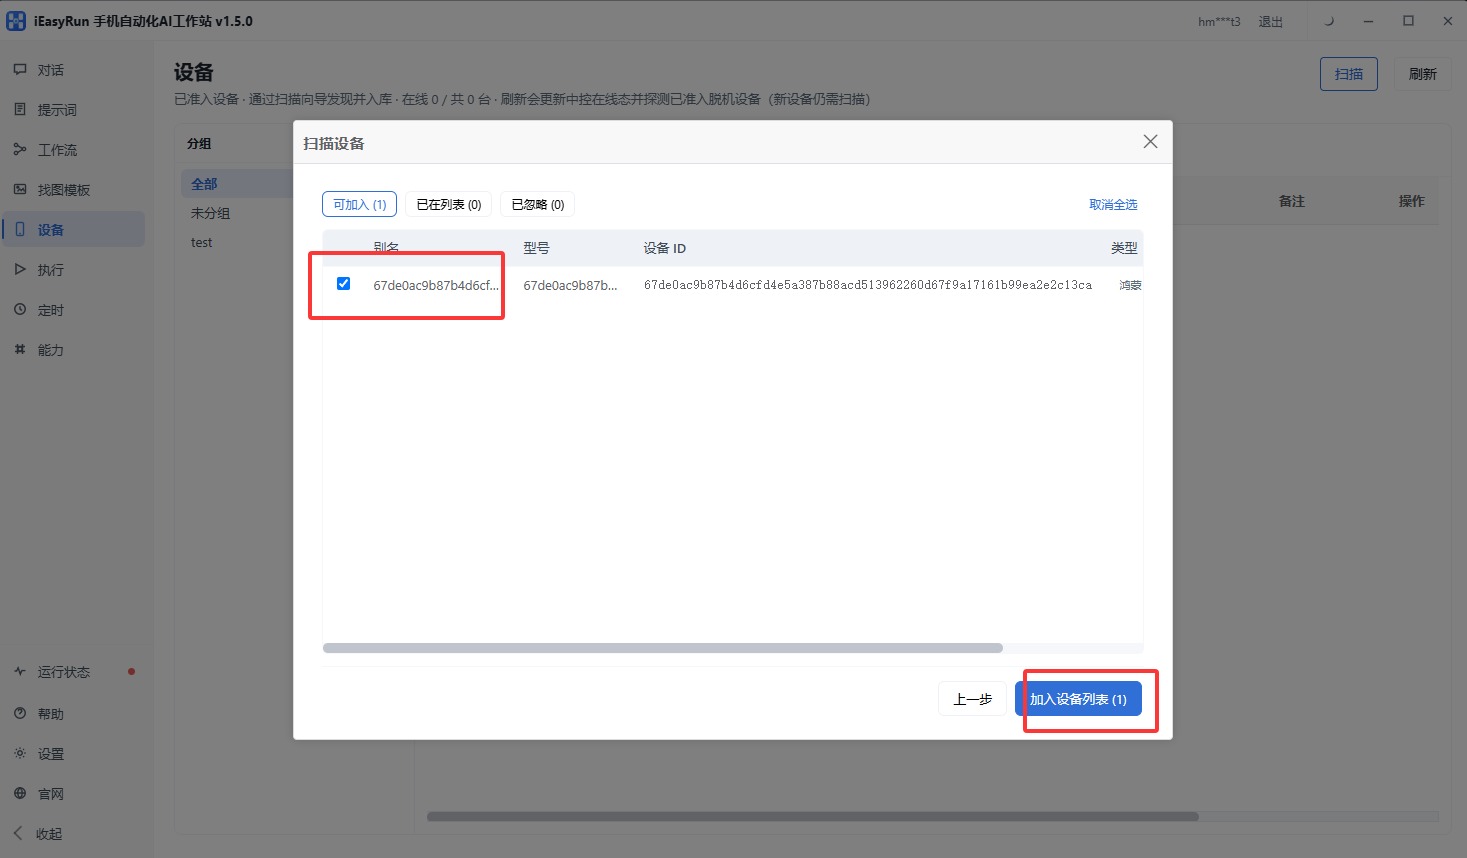
Step 12: Add the device to the list
Select the found device and add it to the device list. You can rename it or add it to a group later.
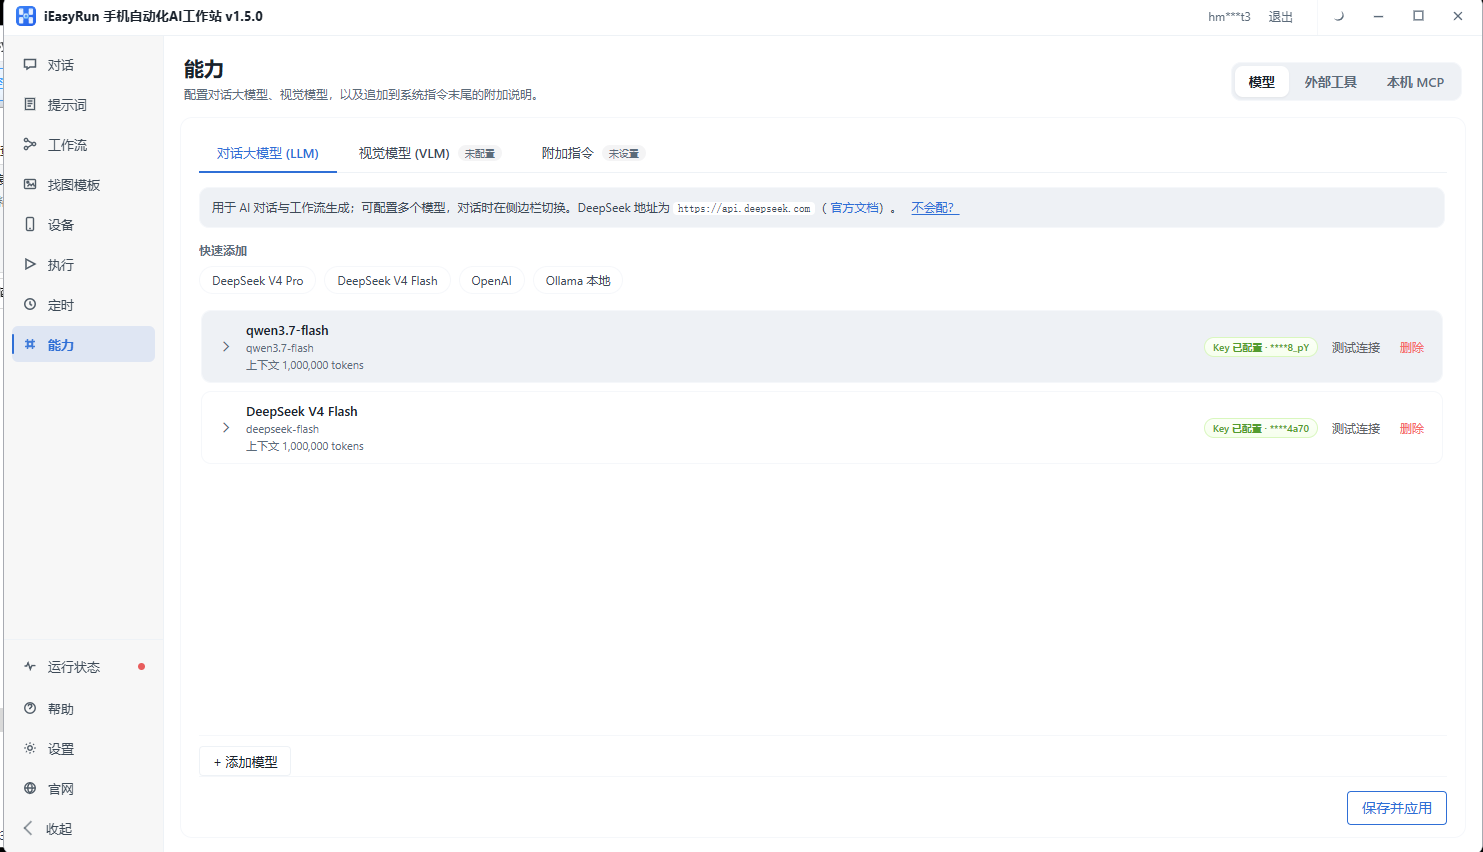
Step 13: Configure a model
Open Capabilities, add and save a model (e.g. DeepSeek) so chat can drive the phone.
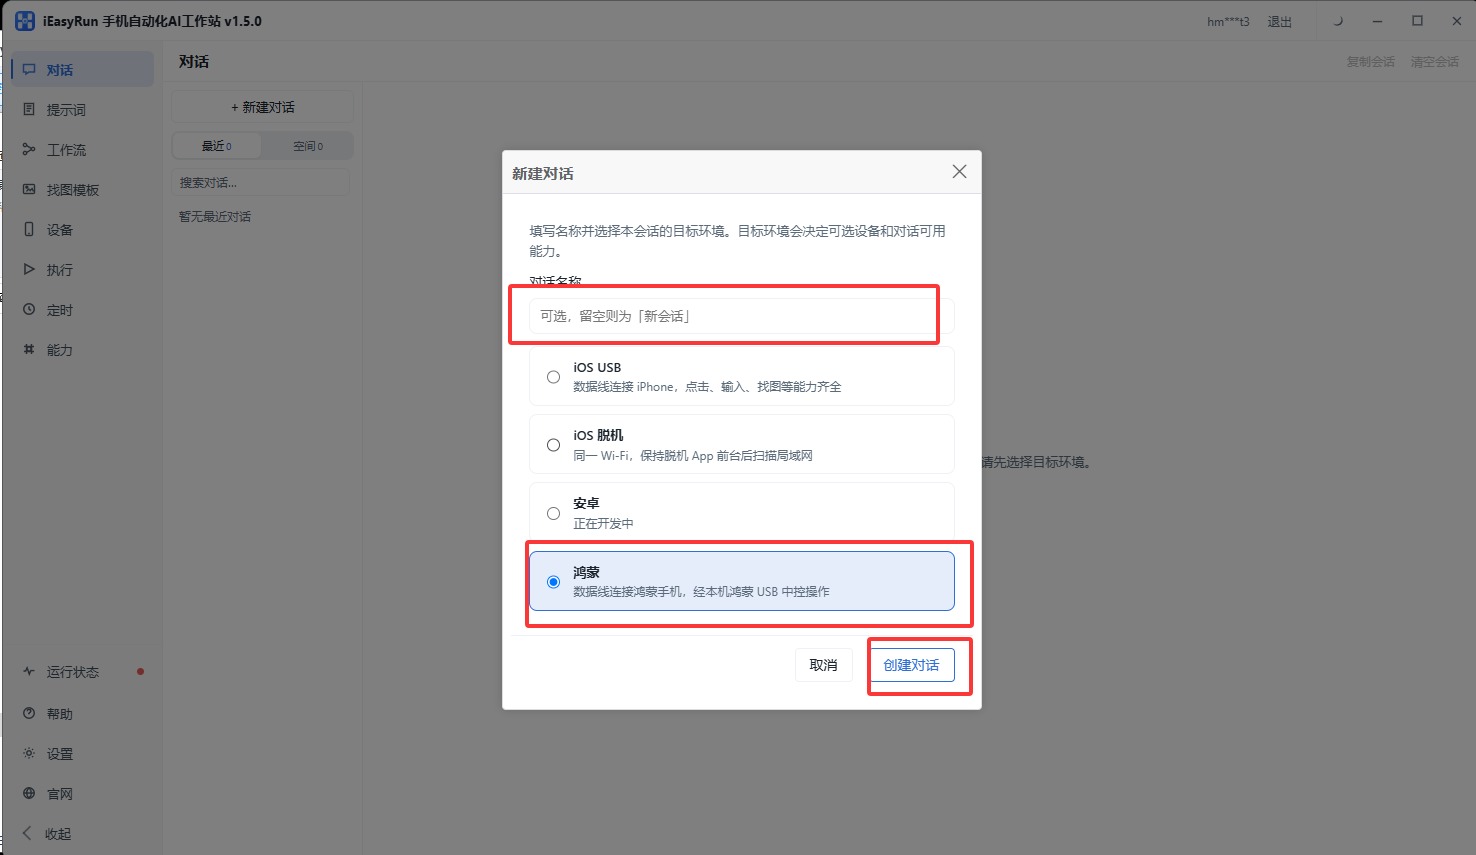
Step 14: Create a chat and pick HarmonyOS
Open Chat → New chat, name it, select HarmonyOS, then create.
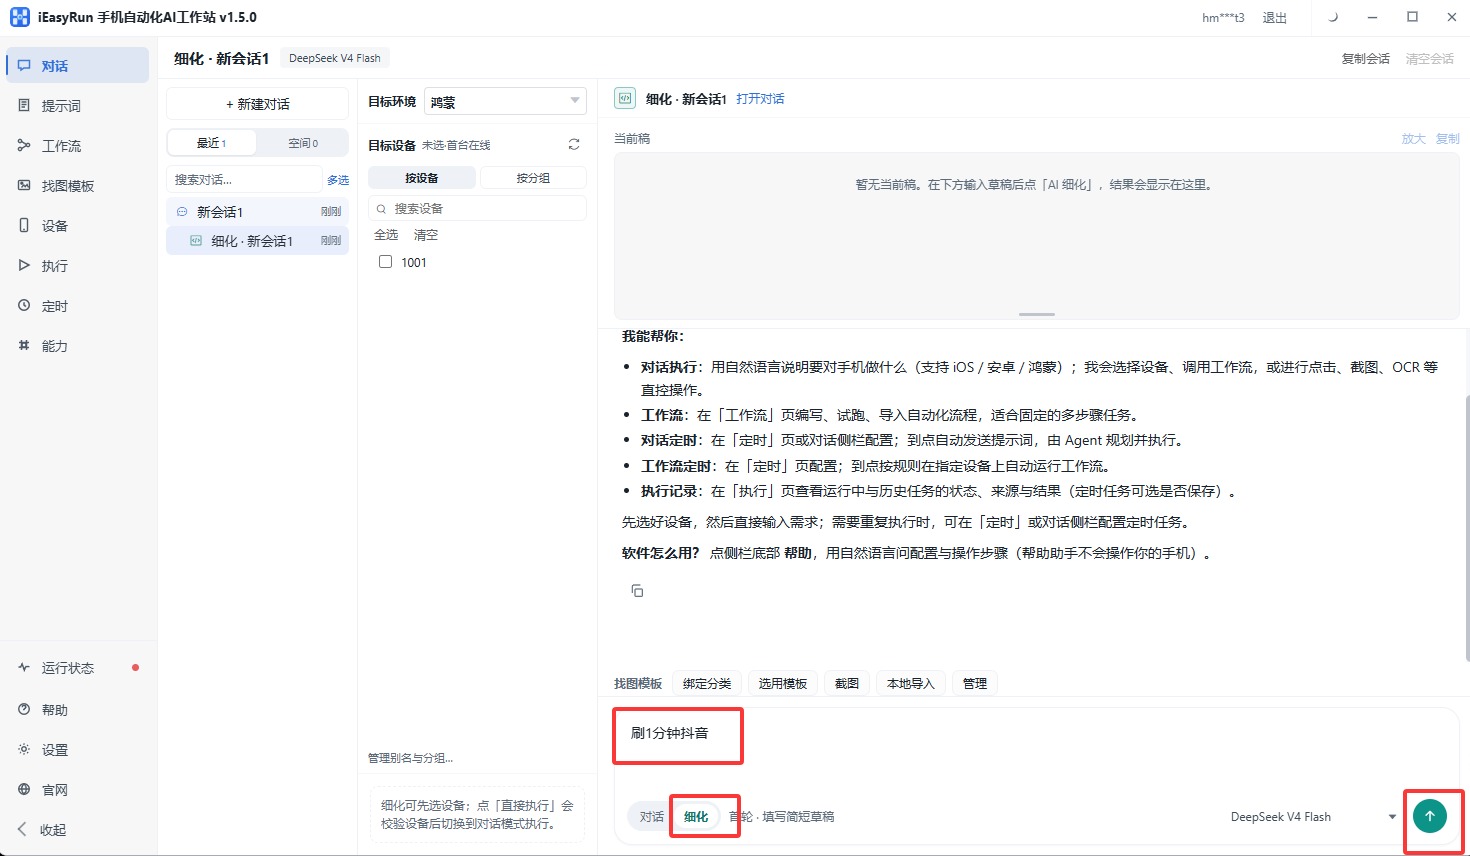
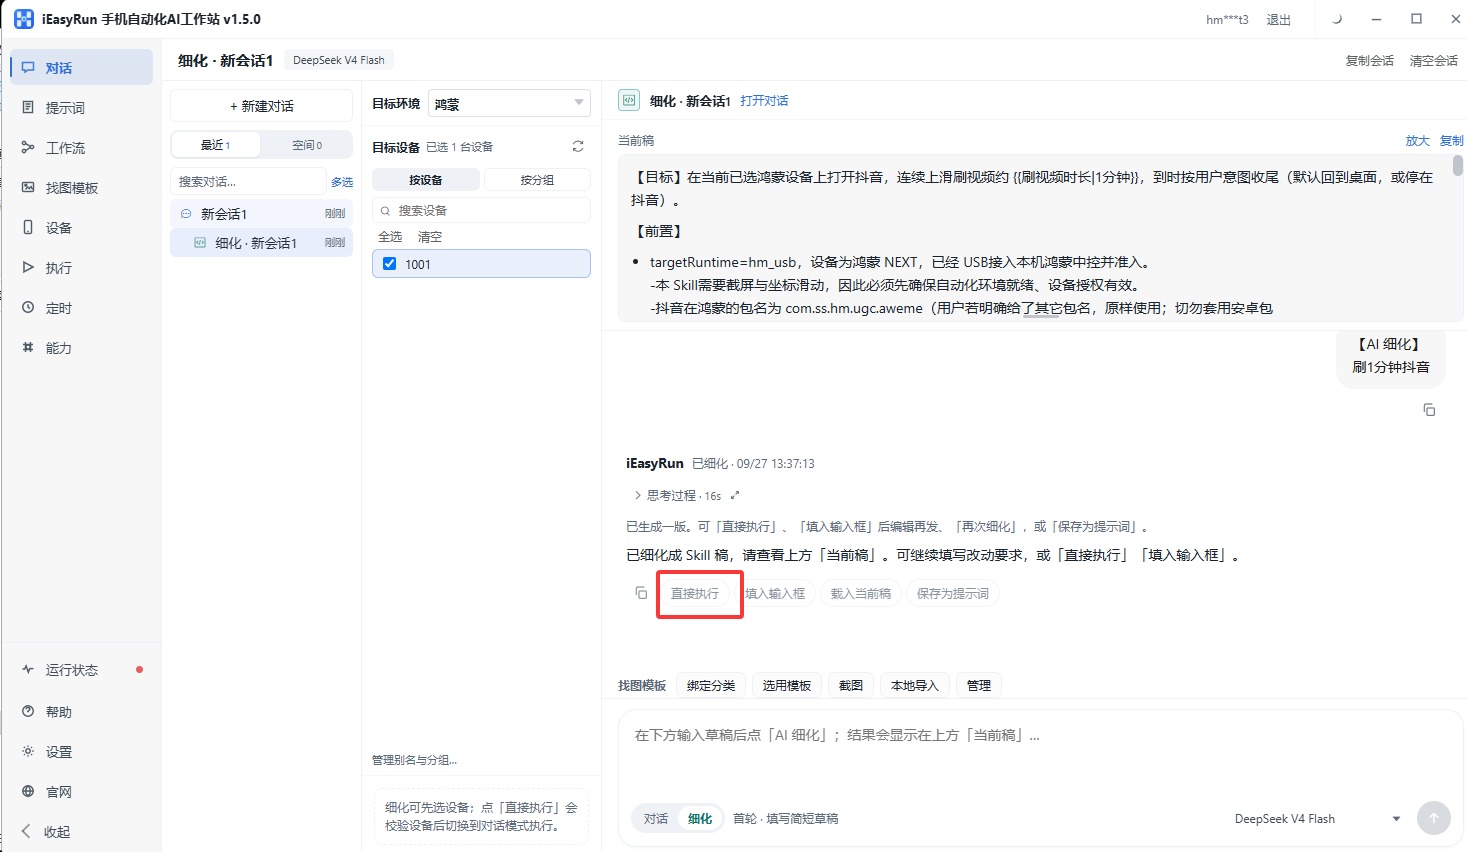
Step 15: Refine the request
On the Refine tab, enter a short request and let AI refine it; refine again until it looks right.
Step 16: Run directly
When refine looks good, click Run directly.
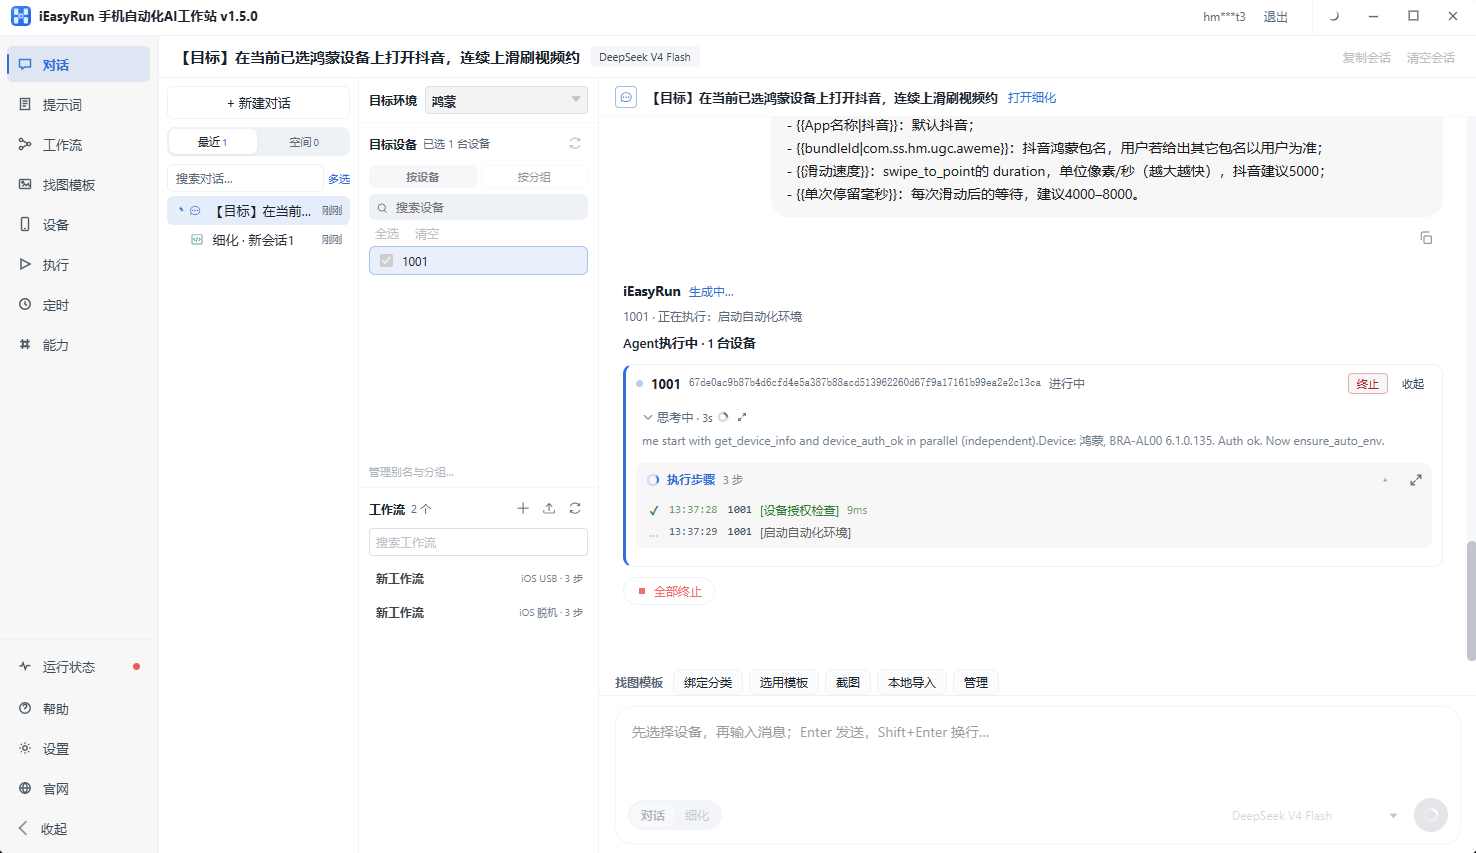
Step 17: Check the result
Watch progress and results on the page.
7. Acceptance checklist
- 新中控.exe signed in; device bound with USB device license; status not stuck red
- Phone Developer Mode on; center sees the device over USB
- iEasyRun signed in; HarmonyOS device appears on Devices and can go online
- A model is configured under Capabilities
- Chat can select the device and run a simple refined task
Then: Getting started
FAQ
| Symptom | Fix |
|---|---|
| Center does not see USB device | Enable Developer Mode; swap cable/port; Always trust debugging |
| Center status stays red | Install VC libraries via downloader, reboot, reopen center |
| Scan finds nothing | Center running + USB device license; scan type HarmonyOS USB; keep USB plugged |
| No license / AI won’t run | License type must be USB device license; buy via official/reseller |
| Workstation won’t open | Install MicrosoftEdgeWebview2Setup.exe and retry |
Related
- Marketing guide: deploy/harmony
- Choose platform
- iOS USB edition
- Devices
- Chat
- Capabilities