Documentation
iOS wireless edition install
On this page
- 1. When to use
- 2. What gets installed
- 3. Before you start
- 4. PC-side install
- Step 1: Select products
- Step 2: Check components
- Step 3: Confirm install folder
- Step 4: Wait for download
- Step 5: Finish install
- 5. Install IPA on the phone
- Step 6: Download the offline main-app IPA
- Step 7: Install with AiSi Assistant
- Step 8: Trust the app and grant permissions
- 6. Offline license and initialization (required)
- Step 9: Run the offline wireless center
- Step 10: See the device in Offline Activator
- Step 11: Bind “Offline device license”
- Step 12: Set BundleId and batch initialize
- Step 13: Confirm license info in the app
- 7. Connect iEasyRun and scan devices
- Step 14: Run iEasyRun
- Step 15: Sign in
- Step 16: Open Devices and scan
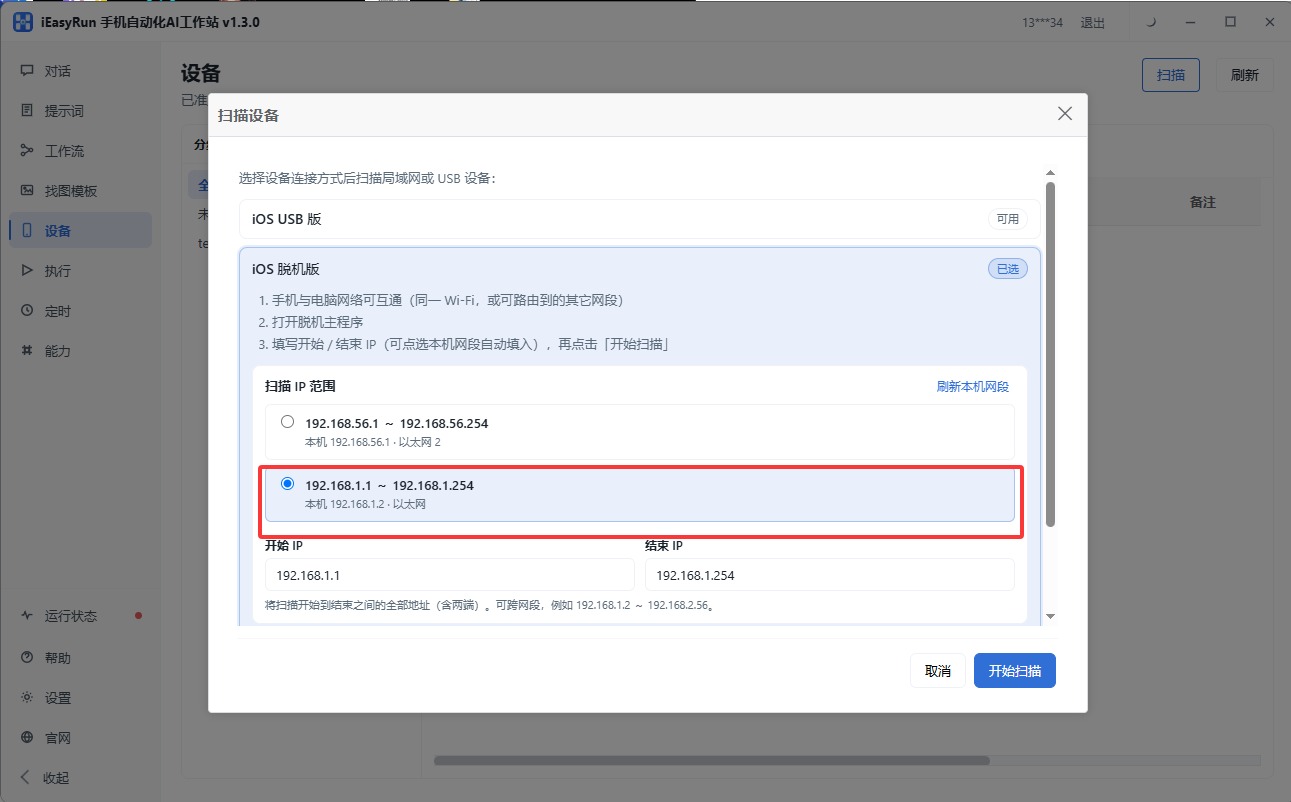
- Step 17: Choose “iOS Offline”
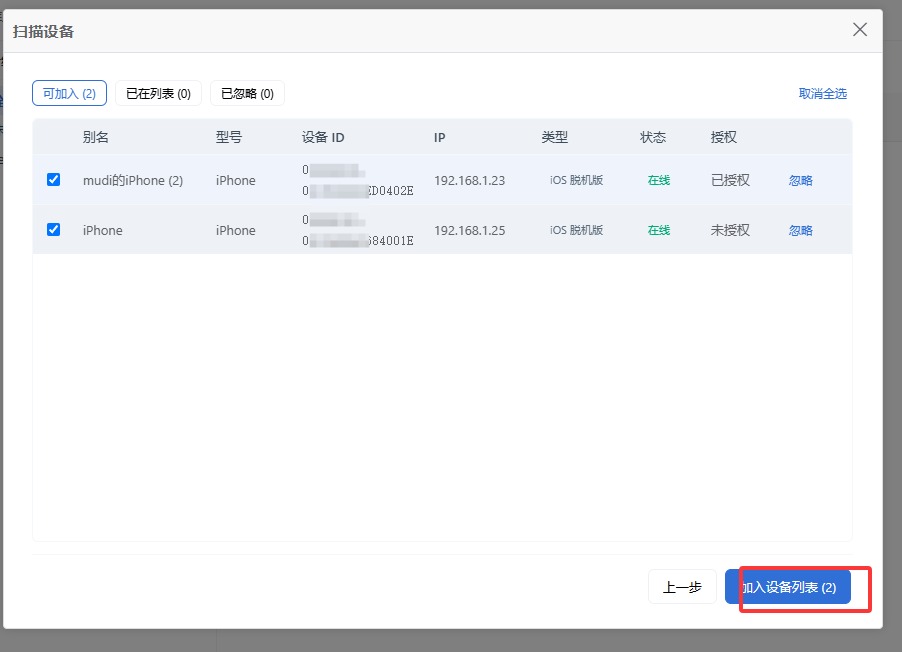
- Step 18: Add the device to the list
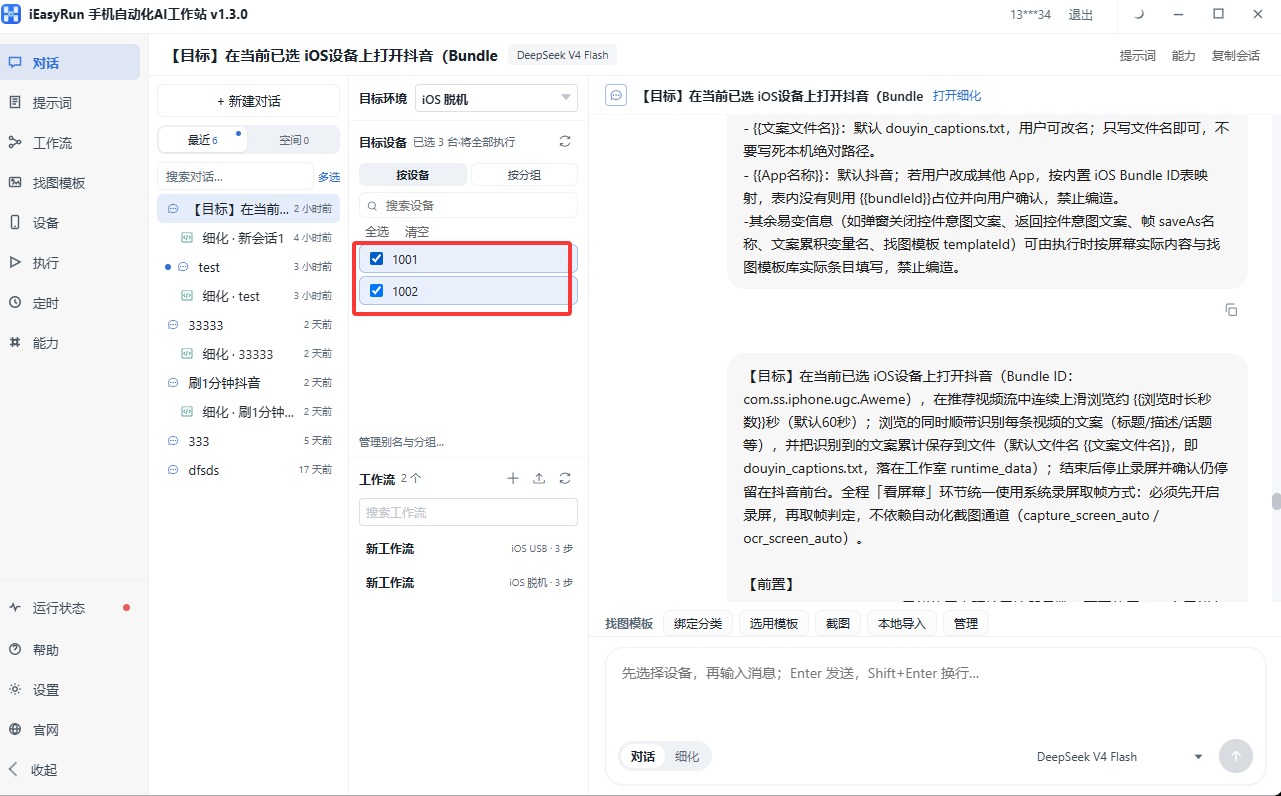
- Step 19: New chat with offline device
- Step 20: Configure a model
- 8. Acceptance checklist
- Troubleshooting
- Related
TL;DR
Downloader → iOS Offline + AI Workstation → install offline wireless center, developer images, iEasyRun → install IPA & trust → use tjcenter-new.exe for offline device license + init → scan iOS Offline in the workstation. Day-to-day tasks use Wi‑Fi; USB is still needed for license / flashing images.
1. When to use
- iPhone and PC on the same LAN; you prefer Wi‑Fi automation
- You need the offline main-app IPA on the phone with iEasyRun chat / workflows / MCP
- Pick either this path or iOS USB edition—don’t mix the two
2. What gets installed
| Component | Role |
|---|---|
| iOS developer image package | Flash developer images for automation |
iOS offline wireless center (tjcenter-new.exe) |
License, init, flash images |
| iEasyRun AI Workstation | Chat, workflows, MCP |
| Offline main-app IPA | Phone agent |
| AiSi Assistant | Install the IPA over USB |
3. Before you start
- Windows PC online; phone and PC preferably on the same Wi‑Fi
- A working USB cable (IPA install, licensing, image flash)
- Enable Developer Mode on iPhone (Settings → Privacy & Security → Developer Mode)
- Turn off protection before install: antivirus, Windows Security real-time protection, temporary firewall off
Downloader: https://ieasyclick.com/downloader
4. PC-side install
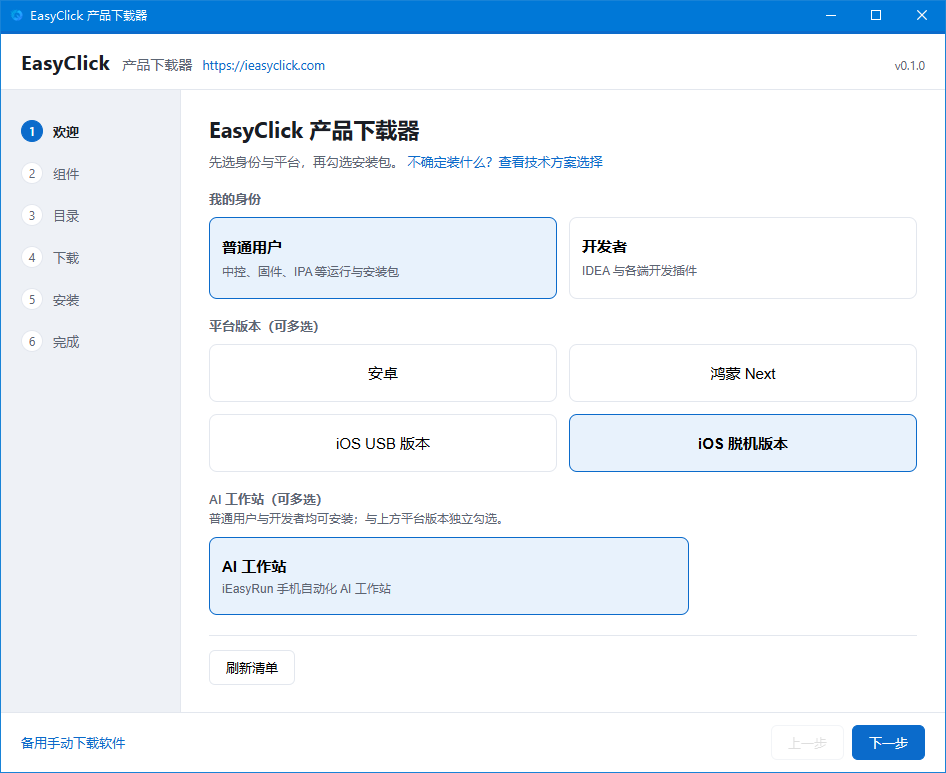
Step 1: Select products
Run the downloader and select:
- Identity: Ordinary user
- Platform: iOS Offline
- AI Workstation: AI Workstation
Click Next.
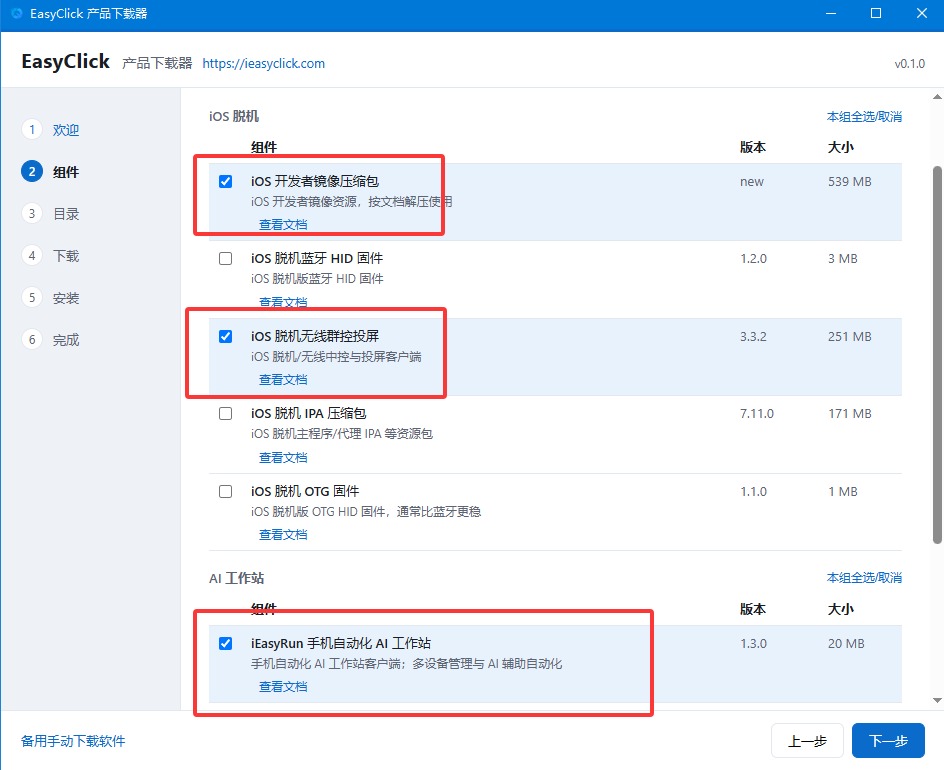
Step 2: Check components
Check these three:
- iOS developer image package
- iOS offline wireless center (license, init, flash images)
- iEasyRun Mobile Automation AI Workstation
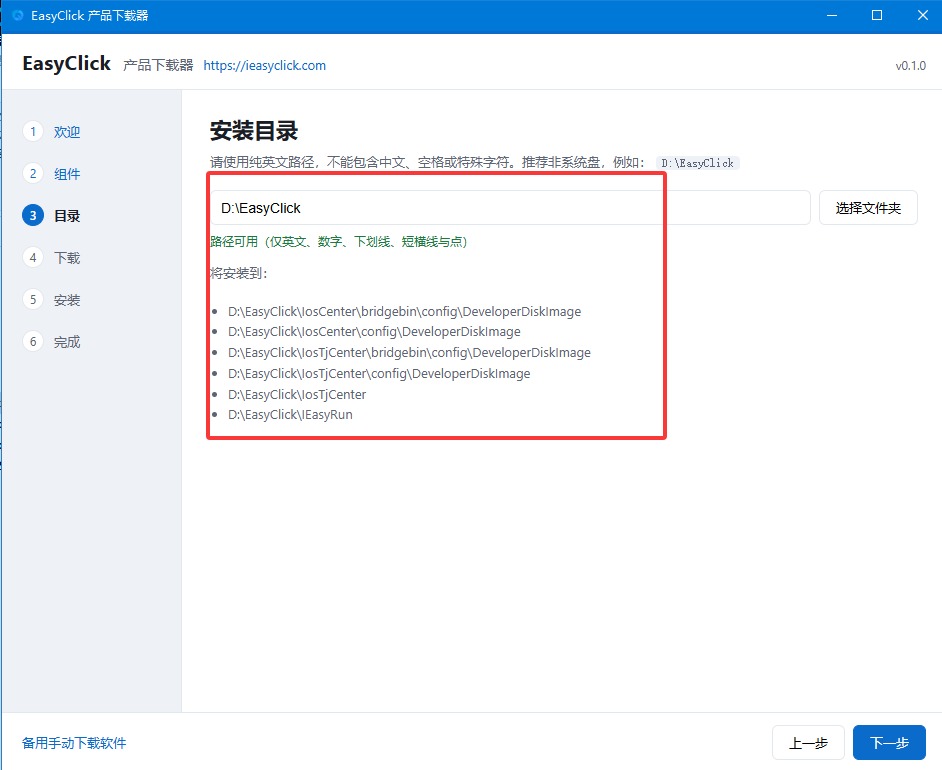
Step 3: Confirm install folder
Default path is fine.
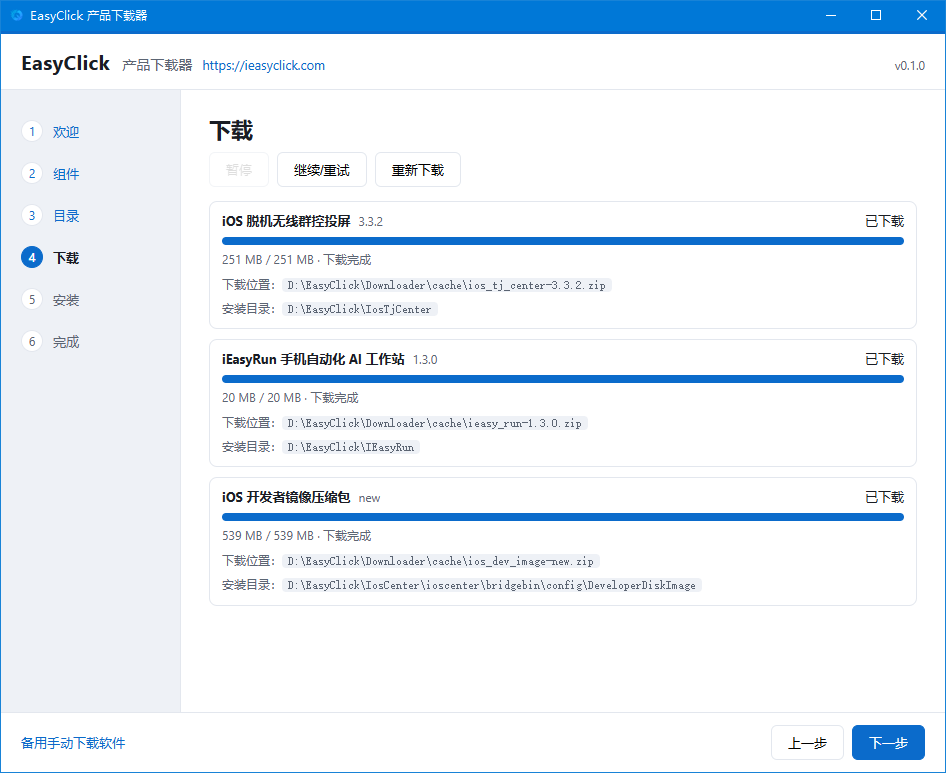
Step 4: Wait for download
Keep the network stable until batch download finishes.
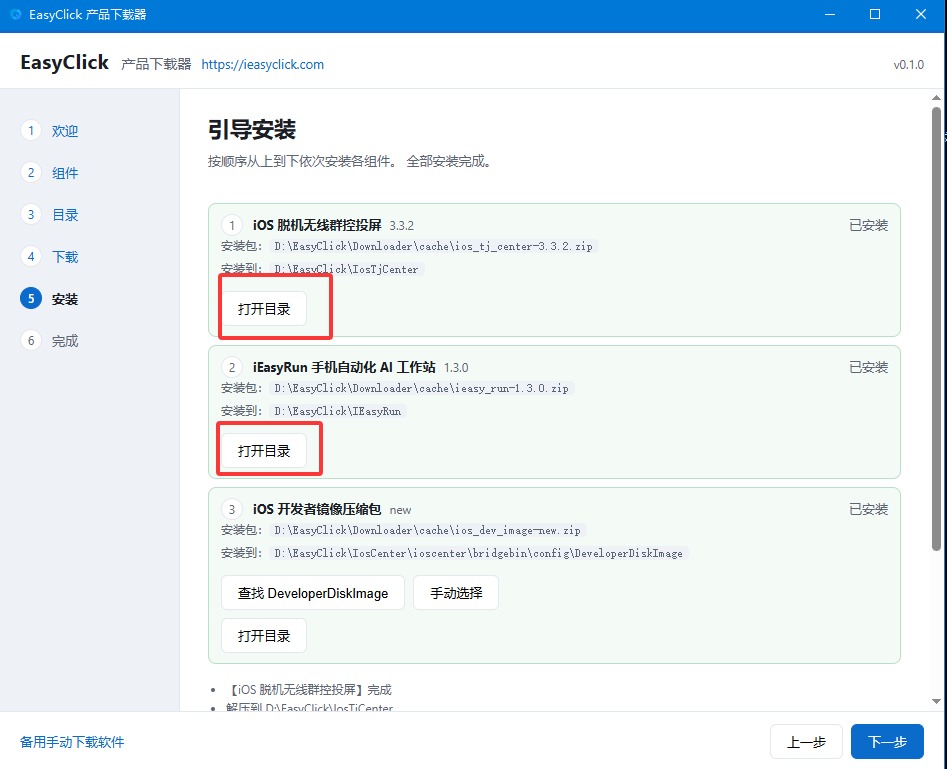
Step 5: Finish install
Follow on-screen install; use Open folder for each product.
5. Install IPA on the phone
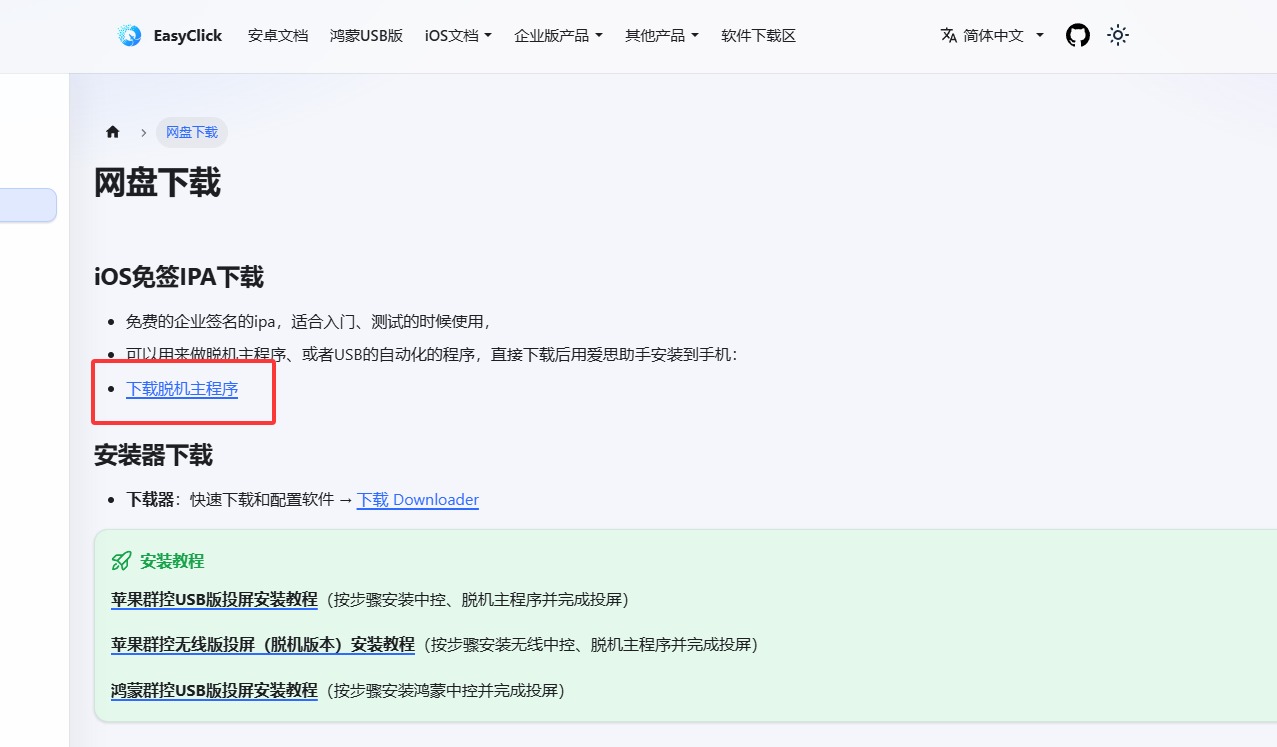
Step 6: Download the offline main-app IPA
- Download area: https://ieasyclick.com/community/download_area
- Direct: https://ieasyclick.com/ec-tj-mainapp
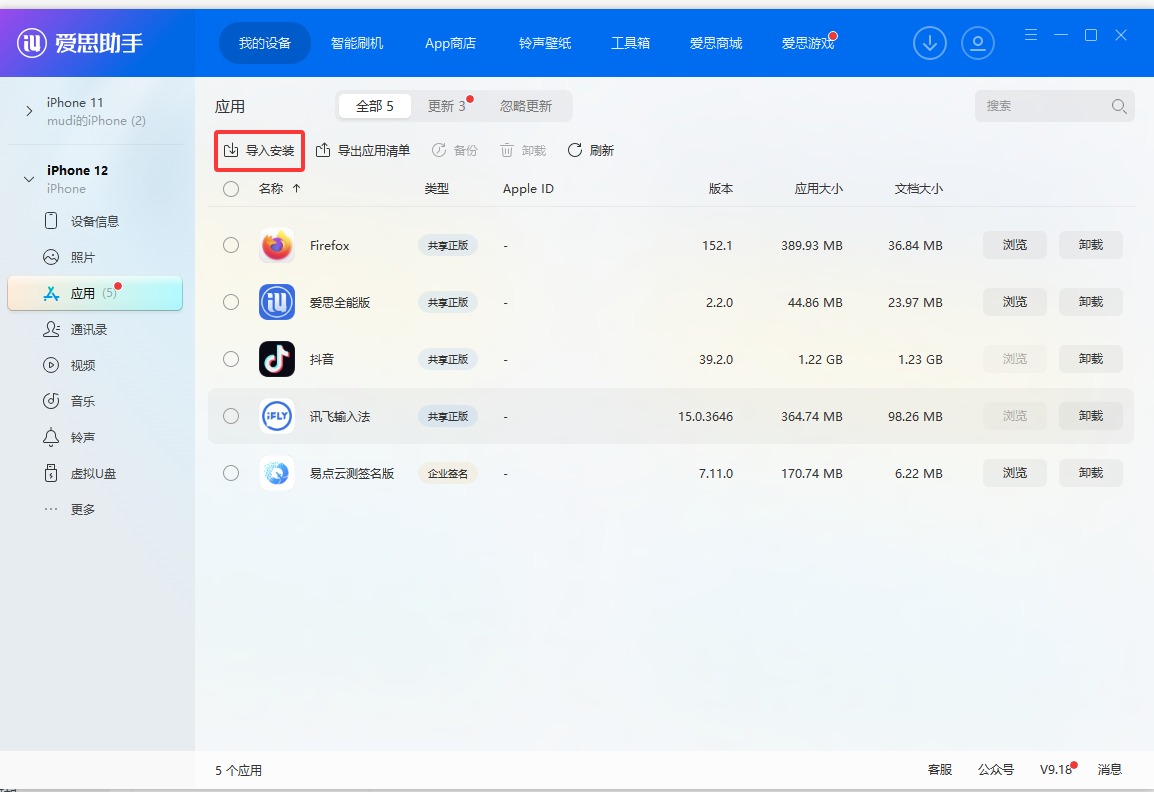
Step 7: Install with AiSi Assistant
- Install AiSi (i4.cn)
- USB-connect iPhone → Trust this computer
- AiSi → Apps → Import & install → select the IPA
If AiSi cannot see the phone, fix cable/port/trust, then try Repair driver.
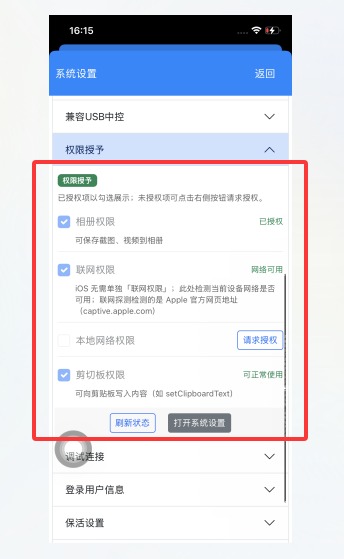
Step 8: Trust the app and grant permissions
- Settings → General → VPN & Device Management → trust the enterprise app
- Open the app; allow prompts, or use App settings → Permission grants
- If the float window blocks the screen: App settings → Keep-alive → use a thinner float style → Save
Also enable keep-alive (all three) and Photos (IME optional).
6. Offline license and initialization (required)
Daily tasks can be wireless, but purchase, bind, init, and image flash still need USB.
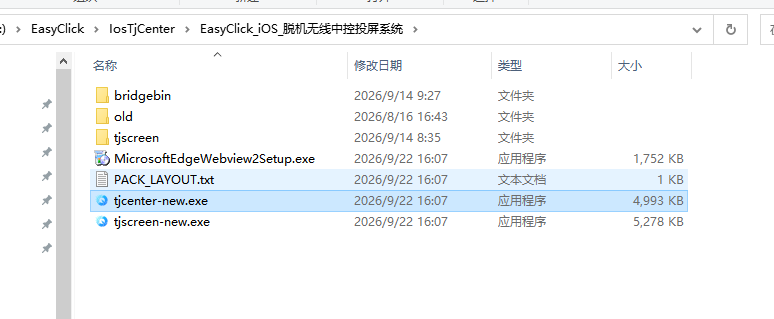
Step 9: Run the offline wireless center
Open the offline wireless install folder and double-click tjcenter-new.exe.
- No account: register
- Existing EasyClick / iEasyRun account: sign in (accounts are shared)
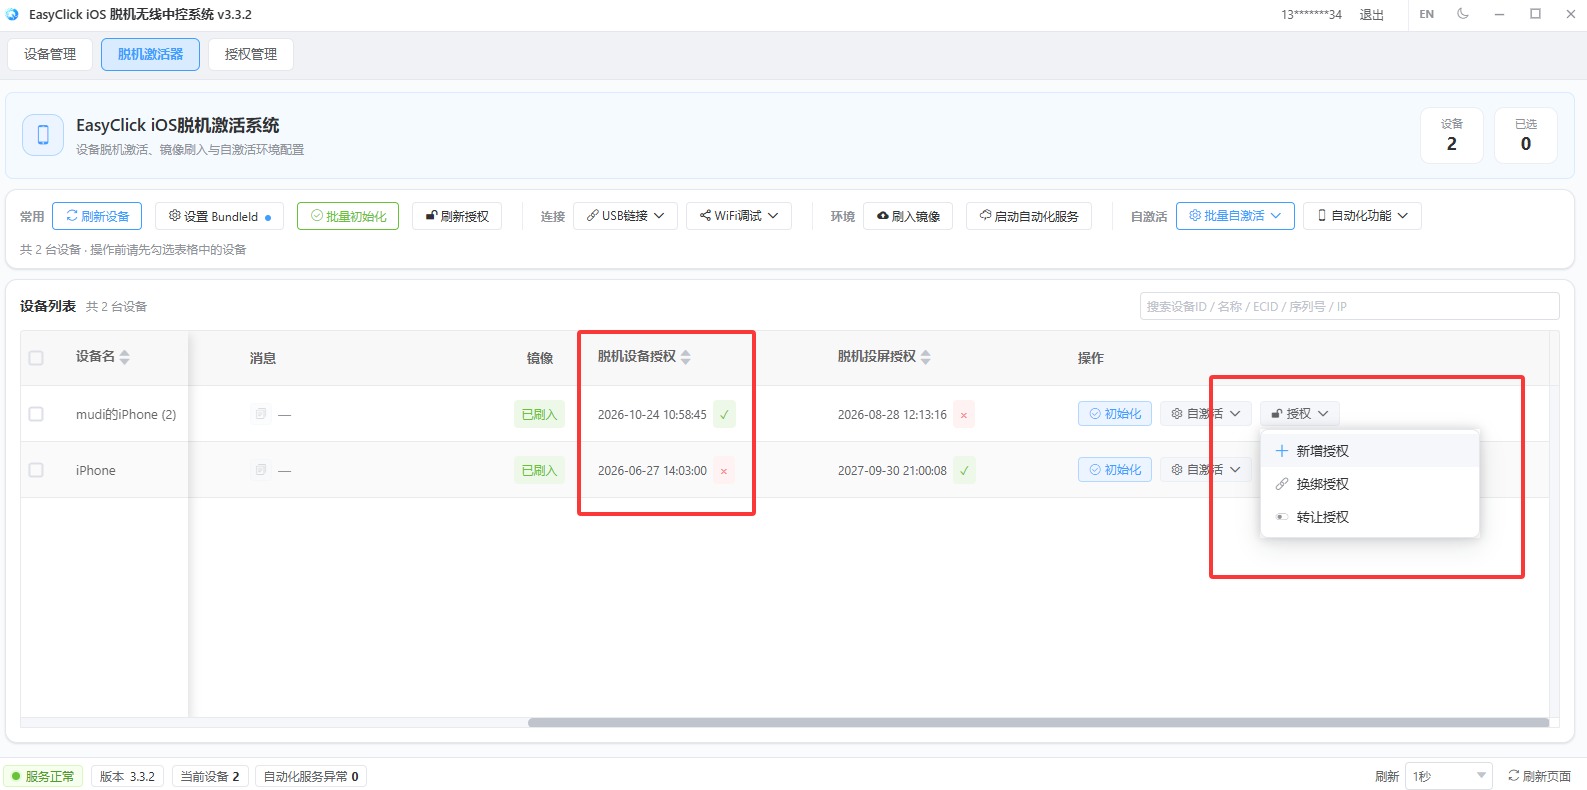
Step 10: See the device in Offline Activator
Open Offline Activator, connect the phone via USB, then purchase a license from official/reseller channels.
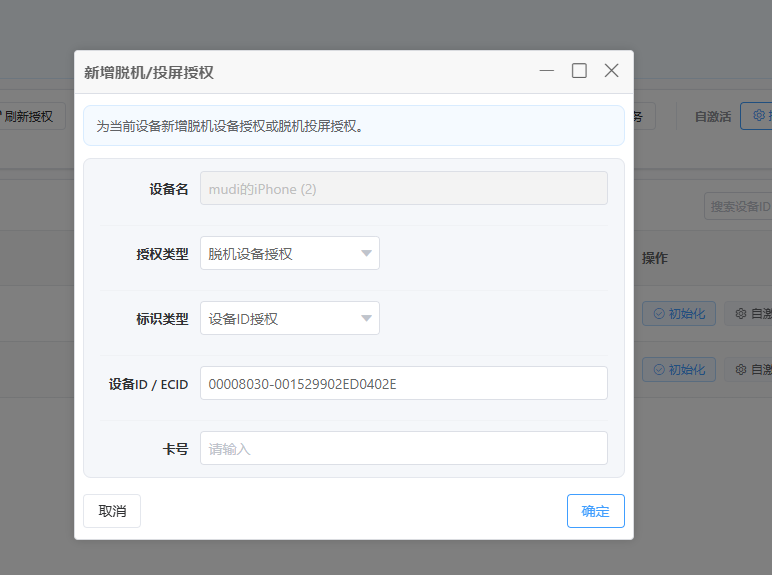
Step 11: Bind “Offline device license”
When binding the card/key, set license type to Offline device license (脱机设备授权)—not USB device license.
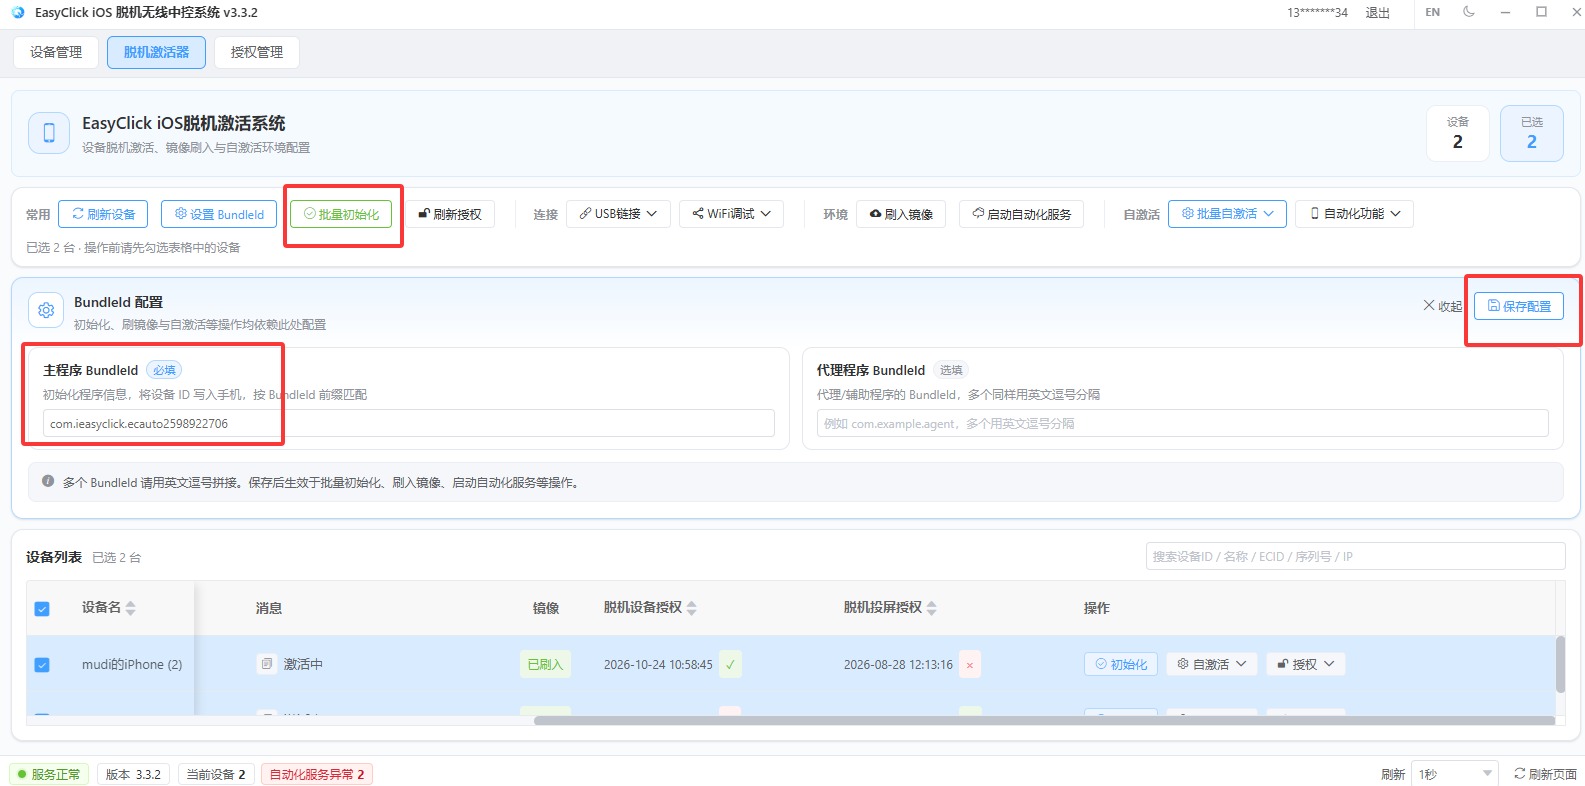
Step 12: Set BundleId and batch initialize
- Set main-app BundleId, commonly
com.ieasyclick.ecauto2598922706
Or copy the identifier from AiSi → Apps → right-click the app - Save
- Select device(s) → Batch initialize until success
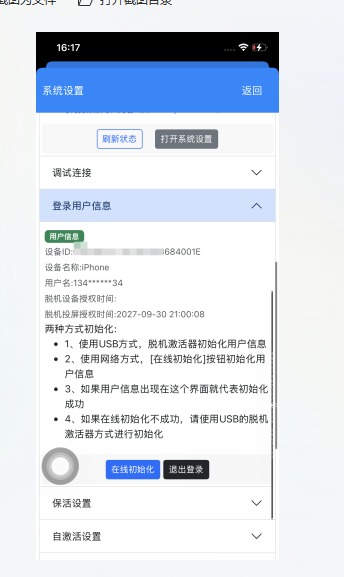
Step 13: Confirm license info in the app
The app should open after init. In App settings, you should see the signed-in user and a valid time. If not, reboot phone + offline center and initialize again.
7. Connect iEasyRun and scan devices
Step 14: Run iEasyRun
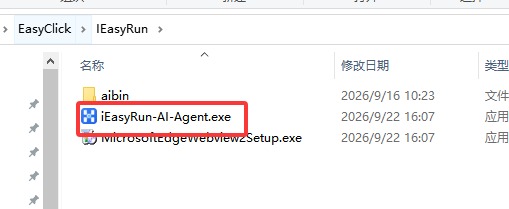
Double-click iEasyRun-AI-Agent.exe. If it won’t open, install MicrosoftEdgeWebview2Setup.exe first.
Step 15: Sign in
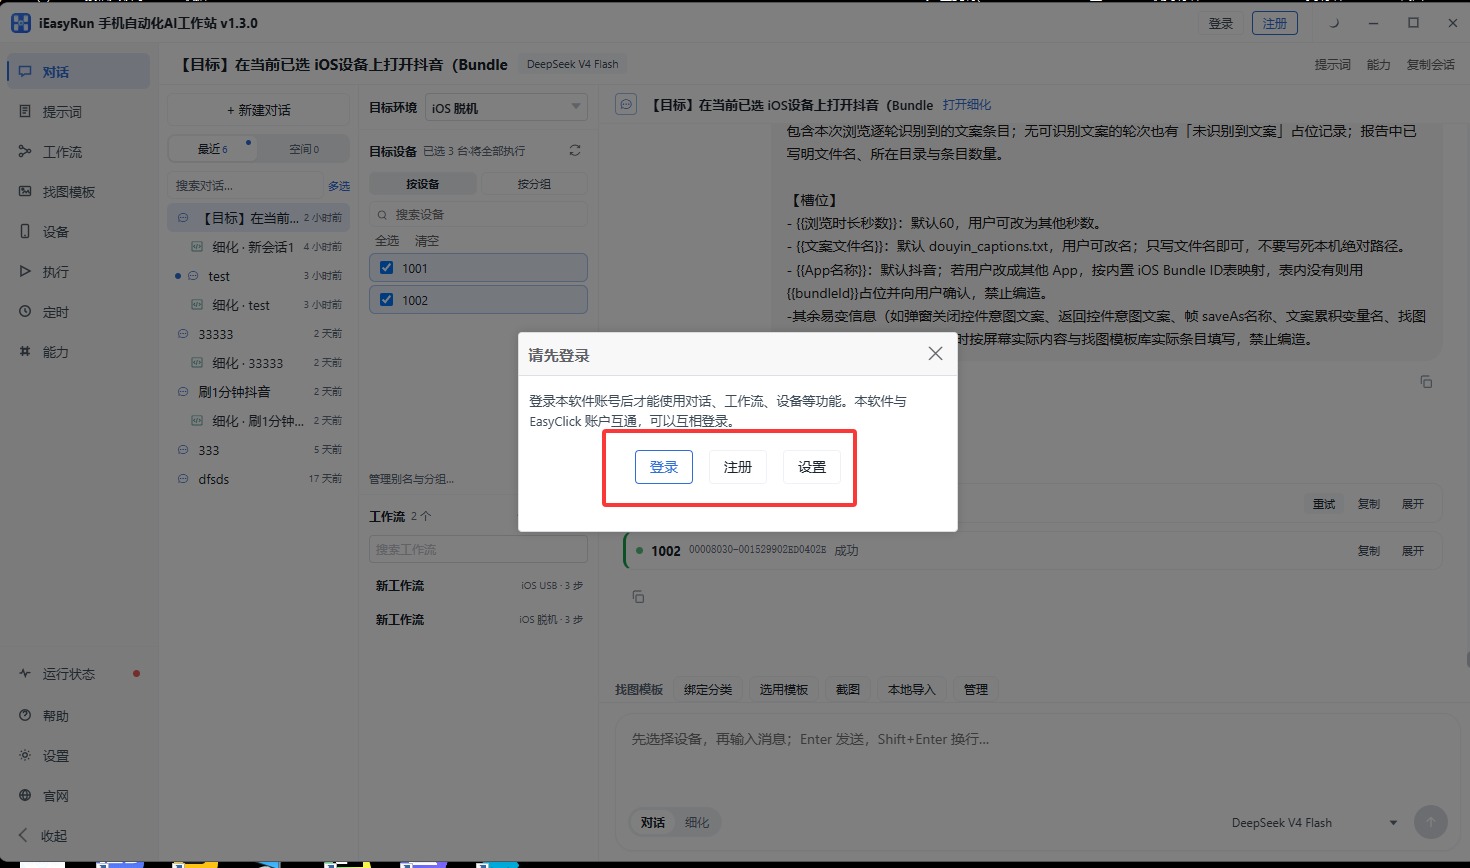
Register or sign in (EasyClick iOS accounts work too).
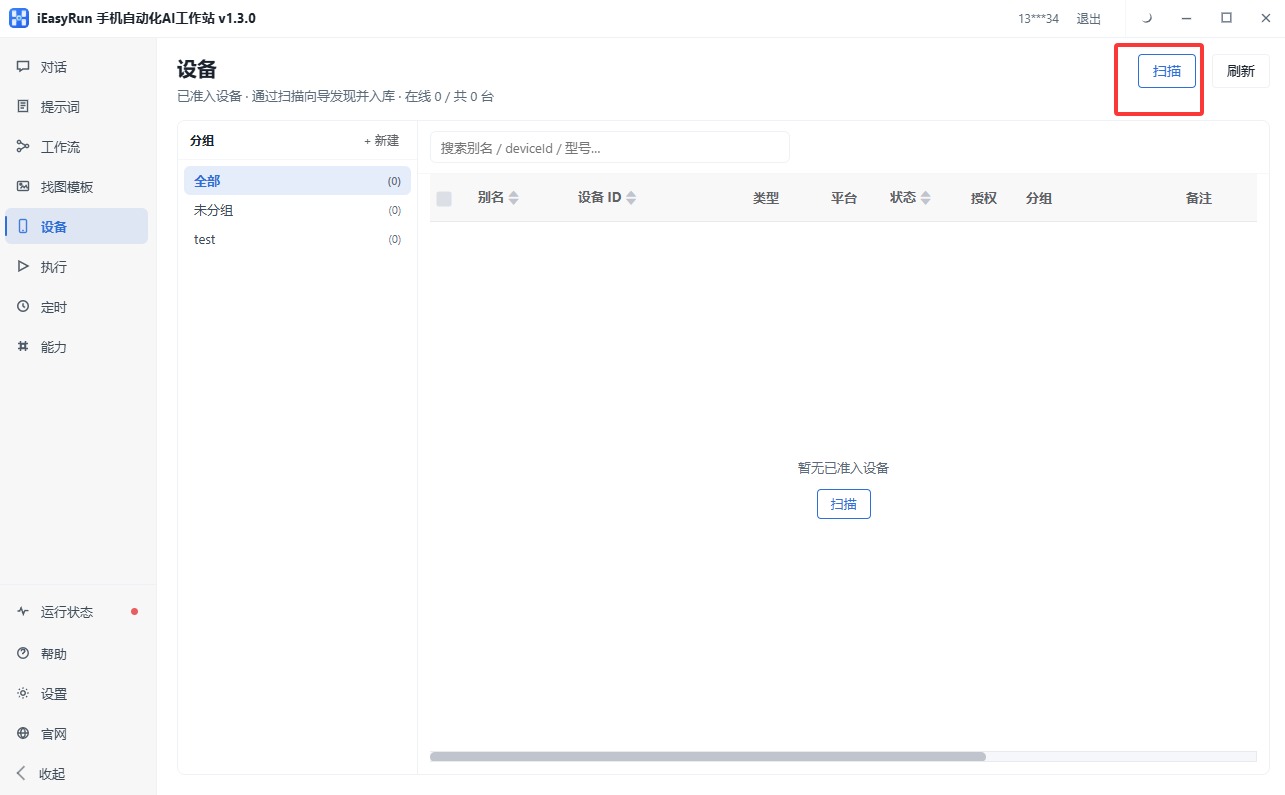
Step 16: Open Devices and scan
Go to Devices → Scan.
Step 17: Choose “iOS Offline”
Select iOS Offline (wireless). Phone and PC must be reachable on the LAN; open the offline main app on the phone; pick a local subnet → Start scan.
Step 18: Add the device to the list
Add discovered devices to the list.
Step 19: New chat with offline device
In Chat, create a session, choose iOS Offline, and pick the device.
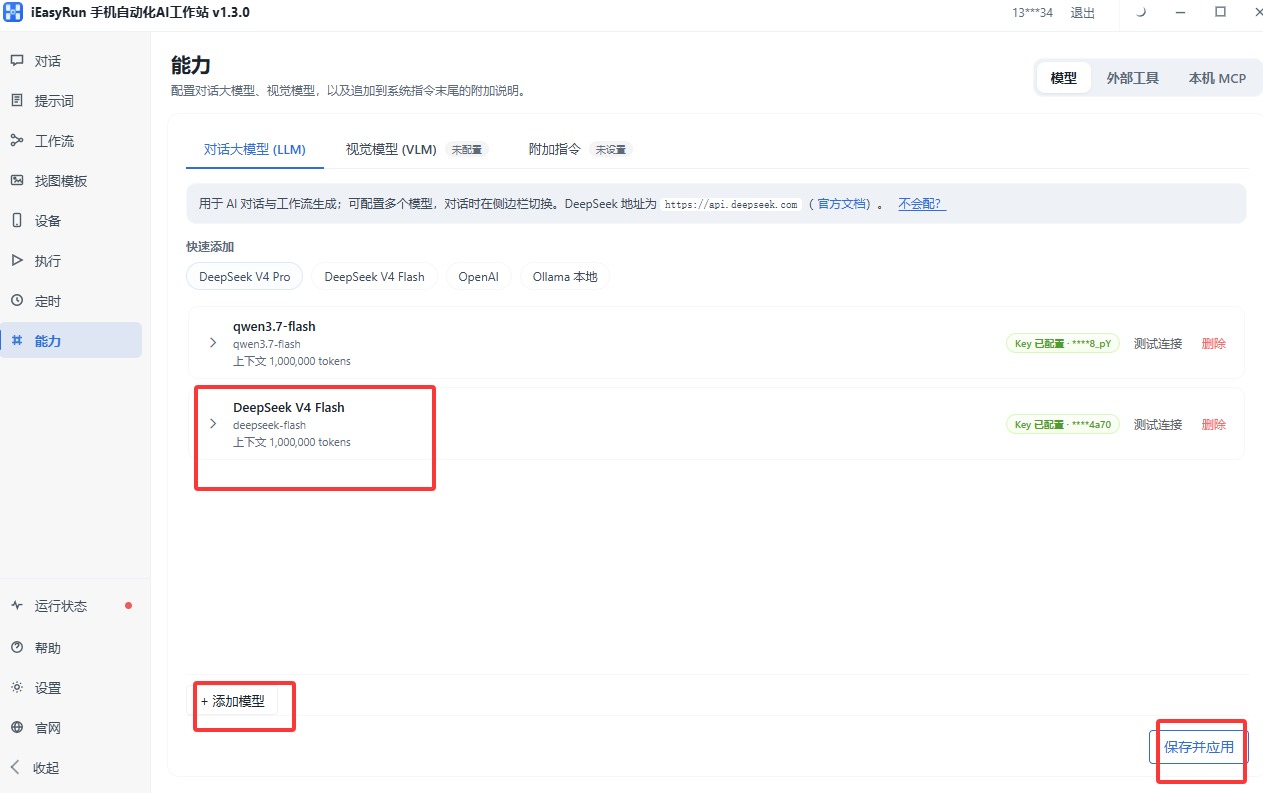
Step 20: Configure a model
Open Capabilities, add and save an LLM so chat can drive the phone.
8. Acceptance checklist
- tjcenter-new.exe signed in; Offline device license bound
- Batch initialize done; App settings shows user + validity
- iEasyRun signed in; device listed under Devices
- Model configured under Capabilities
- Chat can send a simple task to that device
Next: Getting started
Troubleshooting
| Symptom | Fix |
|---|---|
| Automation service won’t start | Enable Developer Mode; check image status in Offline Activator and flash over USB if needed |
| Scan finds nothing | Re-init license info; same subnet; main app running / keep-alive OK |
| After phone reboot, automation fails | Developer images are lost on reboot—USB reconnect and flash images again |
| No license | License type must be Offline device license |
| Confused with USB path | Offline day-to-day uses Wi‑Fi + tjcenter-new.exe; USB path uses 新中控.exe + USB license |
| Workstation won’t open | Install WebView2 setup, then relaunch |
Offline also supports screen-recording, BLE, OTG tap modes, etc. This page only covers install through first successful chat.
Related
- Marketing guide: deploy/ios-wifi
- Choose platform
- iOS USB edition
- Devices
- Chat
- Capabilities