HarmonyOS USB / USB
HarmonyOS USB edition install guide
Install HarmonyOS Next center + iEasyRun → USB-connect the phone with Developer Mode → bind a USB device license in the center → scan HarmonyOS USB in the workstation, then AI-control the phone.
Before you install — turn off protection (important): Disable antivirus, Windows Security (real-time protection, etc.), and temporarily turn off the firewall. Enable Developer Mode on the phone; when asked to trust USB debugging, choose Always trust.
- Step 1
Open the downloader and select products
On the welcome page:
- Identity: Ordinary user
- Platform: HarmonyOS Next
- AI Workstation: AI Workstation
Then click Next.
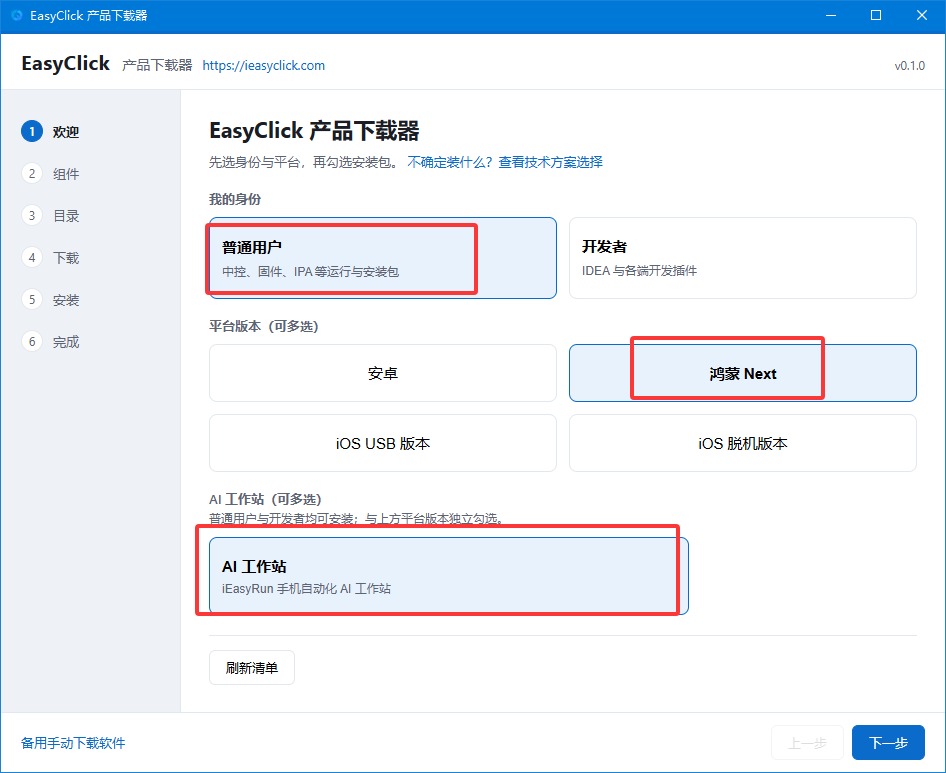
Fig. 1 · Select HarmonyOS Next and AI Workstation - Step 2
Check the install components
Check these two:
- HarmonyOS Next center / casting
- iEasyRun Mobile Automation AI Workstation
Then click Next.
If the center status bar later stays red, install VC libraries via the downloader, reboot, then reopen the center.
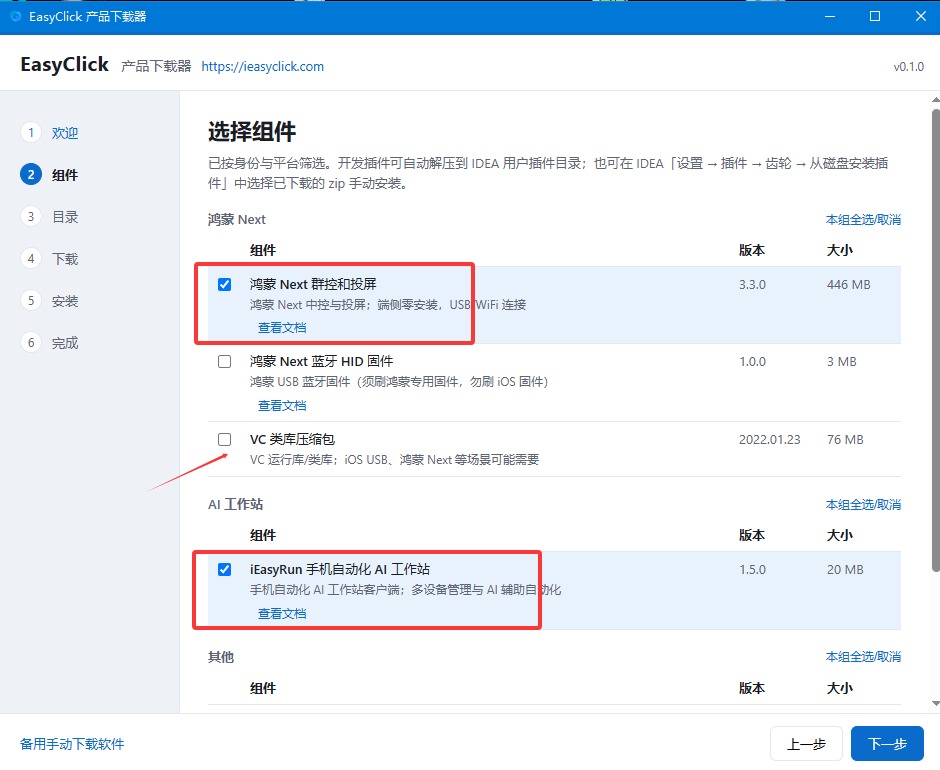
Fig. 2 · Check HarmonyOS Next center and iEasyRun - Step 3
Confirm the install folder
The default path is fine—confirm and continue.
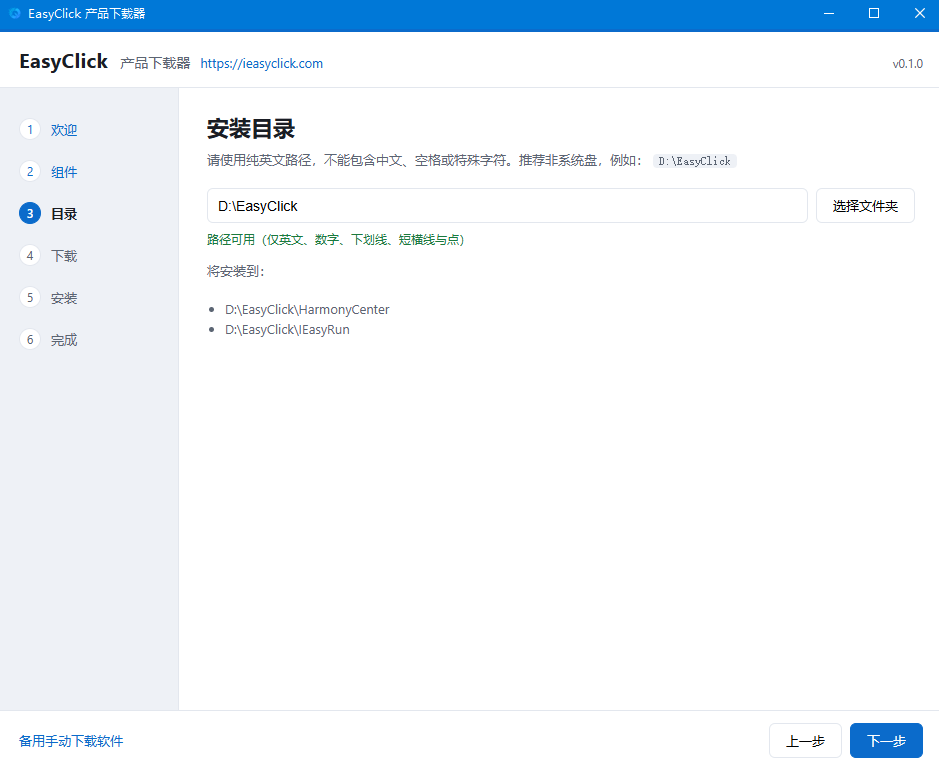
Fig. 3 · Confirm install folder - Step 4
Wait for software download
Keep the network stable until batch download finishes, then click Next.
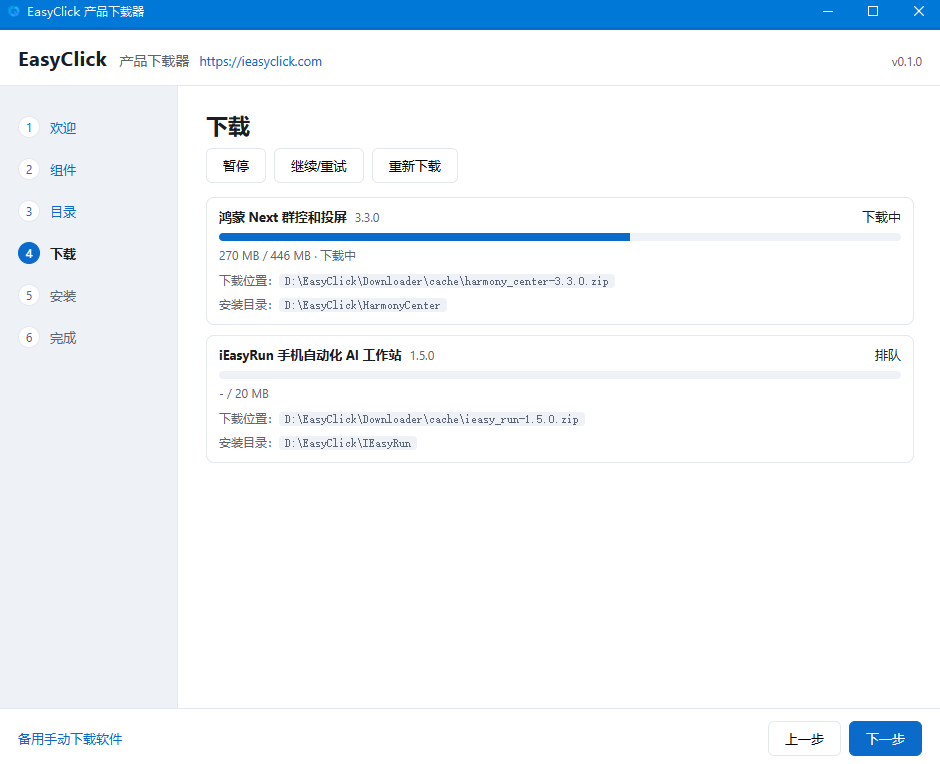
Fig. 4 · Batch download - Step 5
Finish install from the prompts
Follow on-screen install. Use Open folder to see where each product was installed.
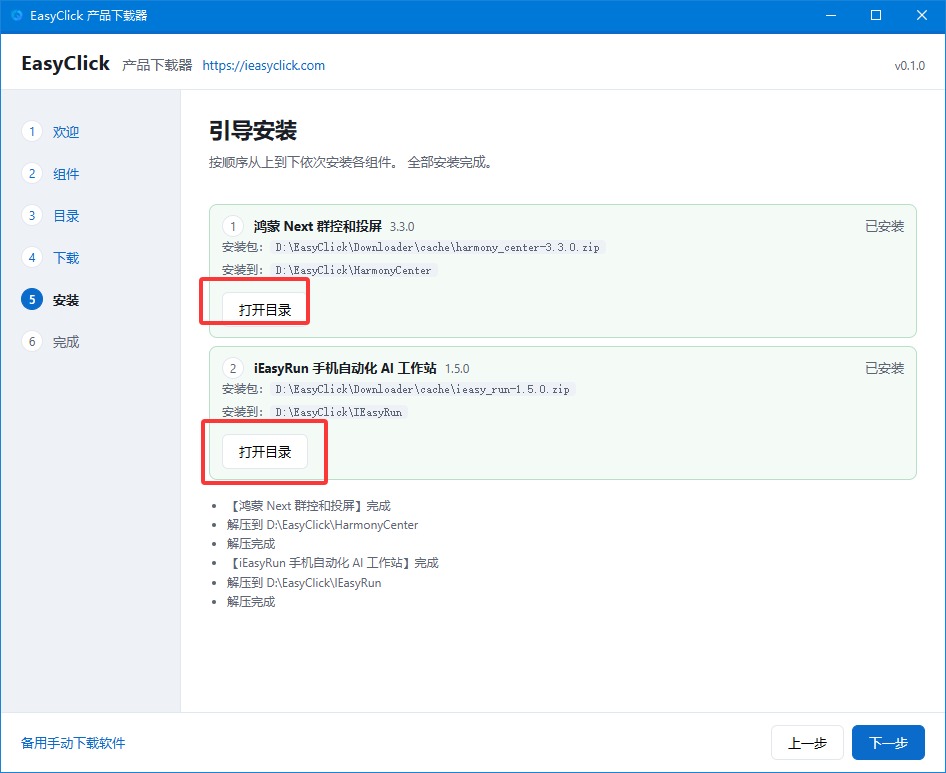
Fig. 5 · Install complete - Step 6
Run the HarmonyOS center
Open the HarmonyOS center folder and double-click 新中控.exe.
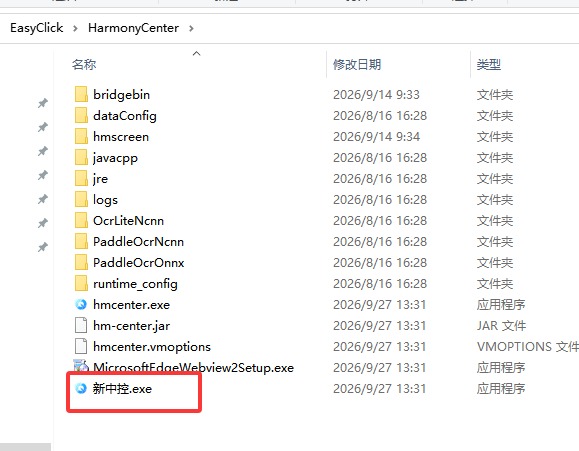
Fig. 6 · Double-click 新中控.exe - Step 7
Sign in and USB-connect the phone
- No account: register
- Existing EasyClick (iOS / HarmonyOS) or iEasyRun account: sign in (shared)
- USB-connect the phone; enable Developer Mode; choose Always trust
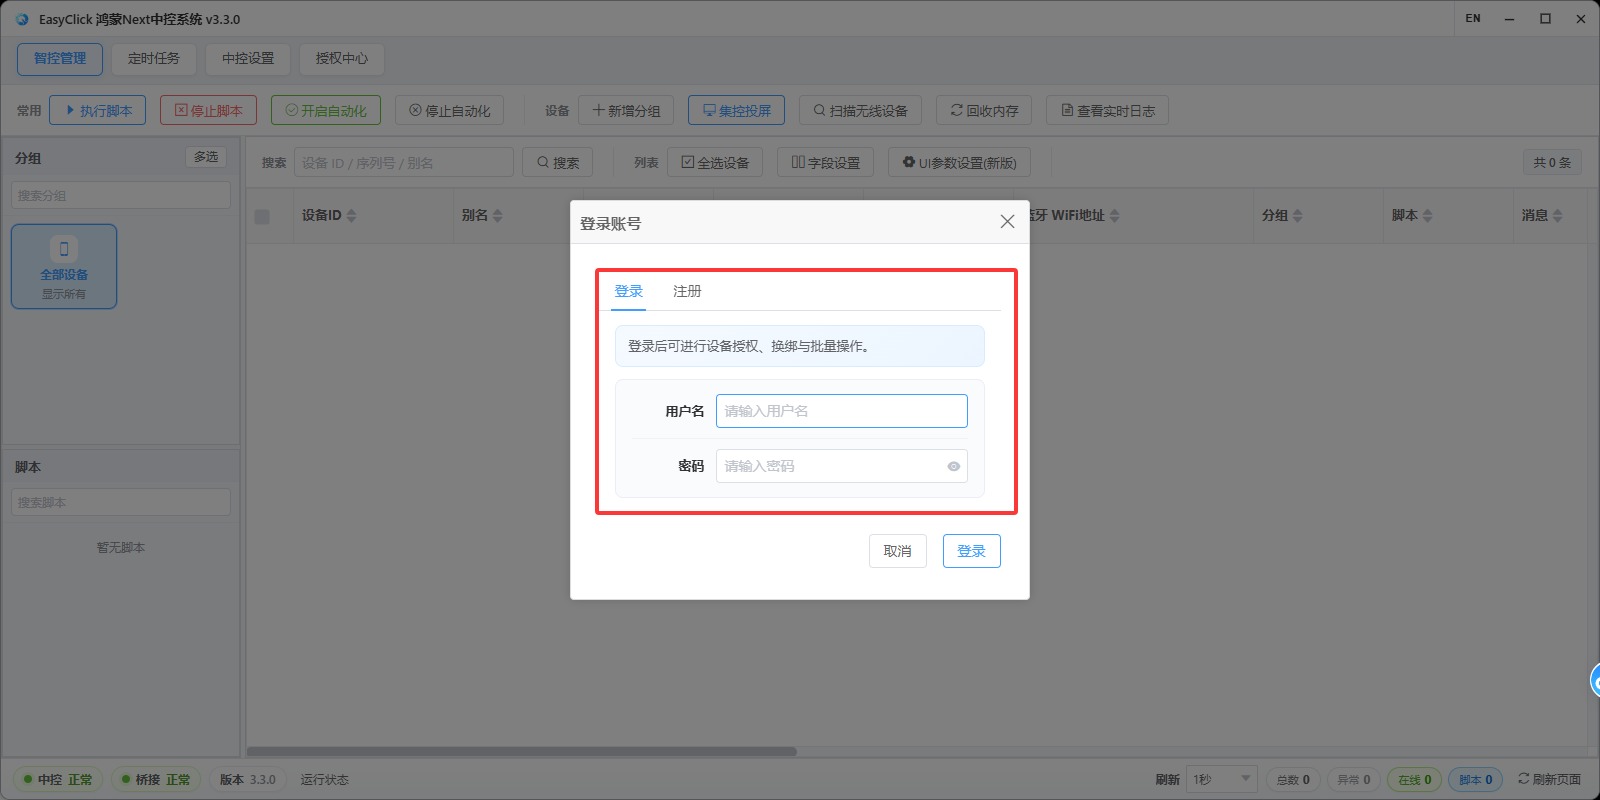
Fig. 7 · Sign in and connect the phone - Step 8
Bind “USB device license”
Open License Center, purchase a license from official/reseller channels, bind type USB device license (not another type), then confirm.
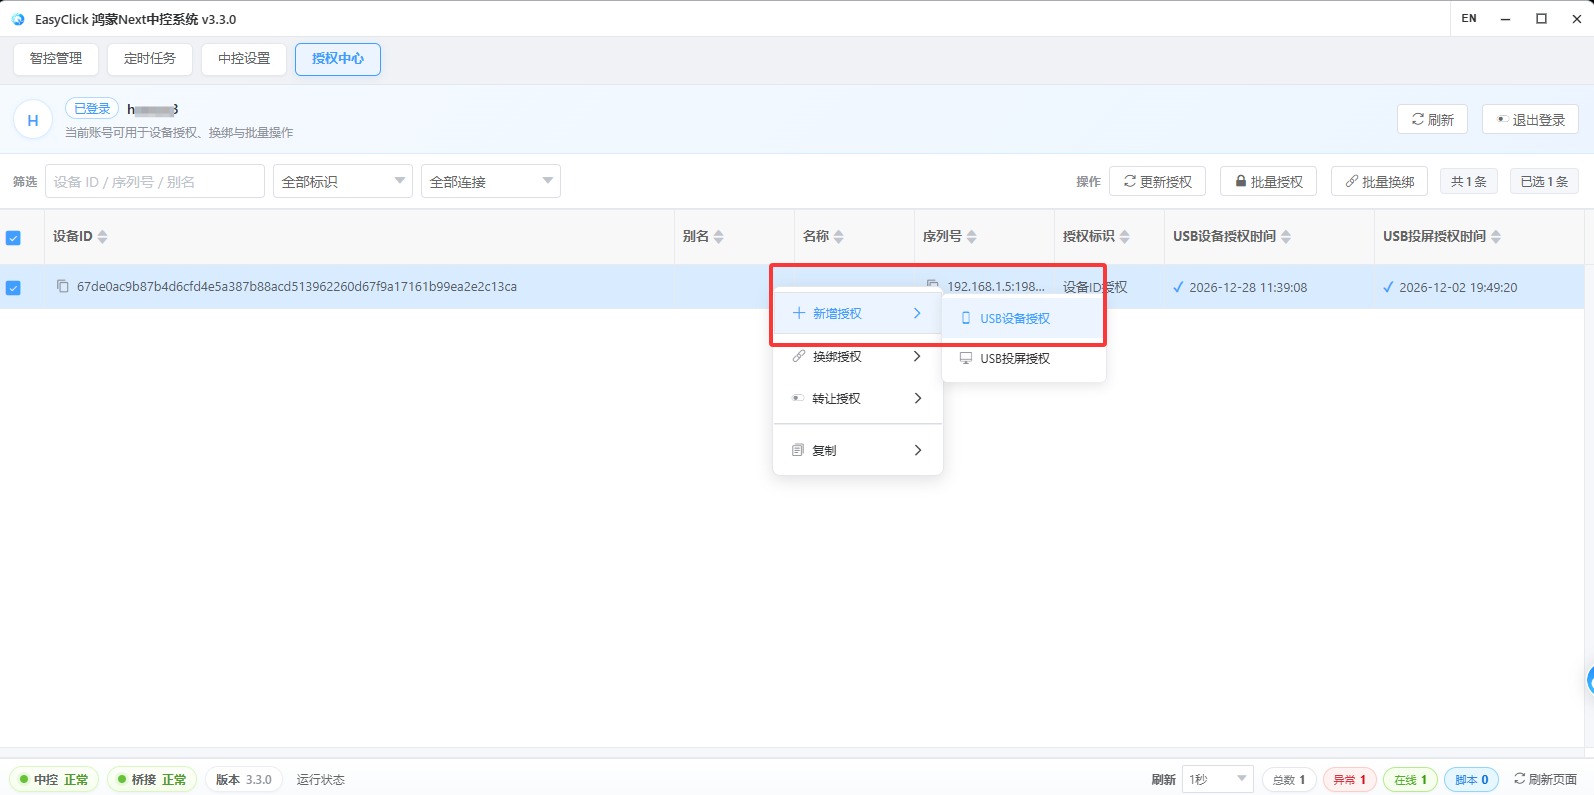
Fig. 8 · Bind USB device license - Step 9
Run iEasyRun
Open the iEasyRun folder and double-click iEasyRun-AI-Agent.exe. If it won’t start, run MicrosoftEdgeWebview2Setup.exe first.
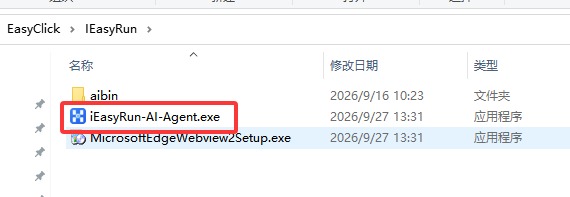
Fig. 9 · Double-click iEasyRun-AI-Agent.exe - Step 10
Sign in to the workstation
Register if needed, or sign in. EasyClick iOS / HarmonyOS accounts work too.
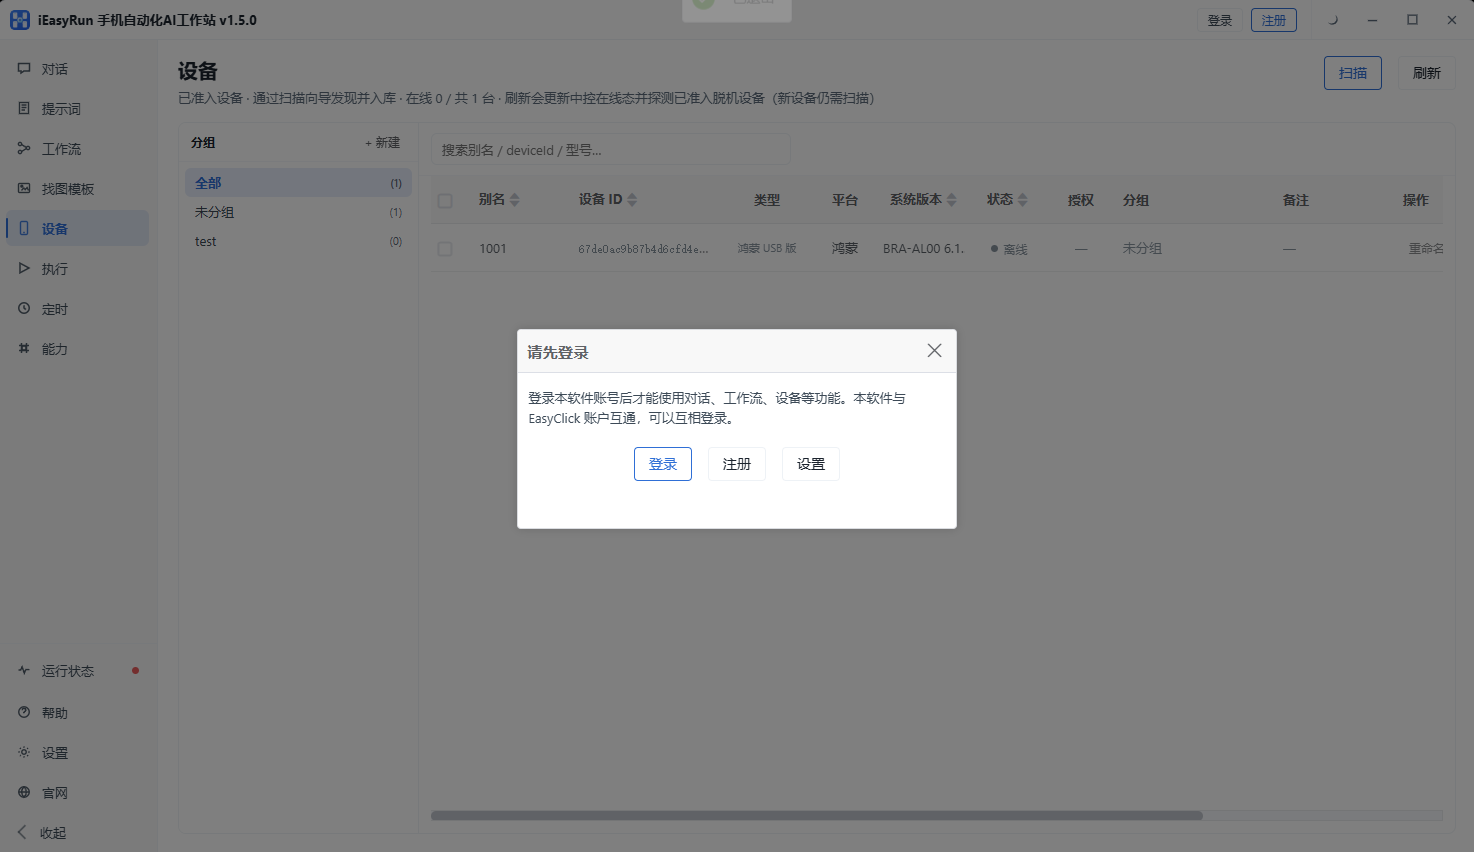
Fig. 10 · Sign in to iEasyRun - Step 11
Open Devices and scan HarmonyOS USB
Go to Devices, click Scan, and choose HarmonyOS USB.
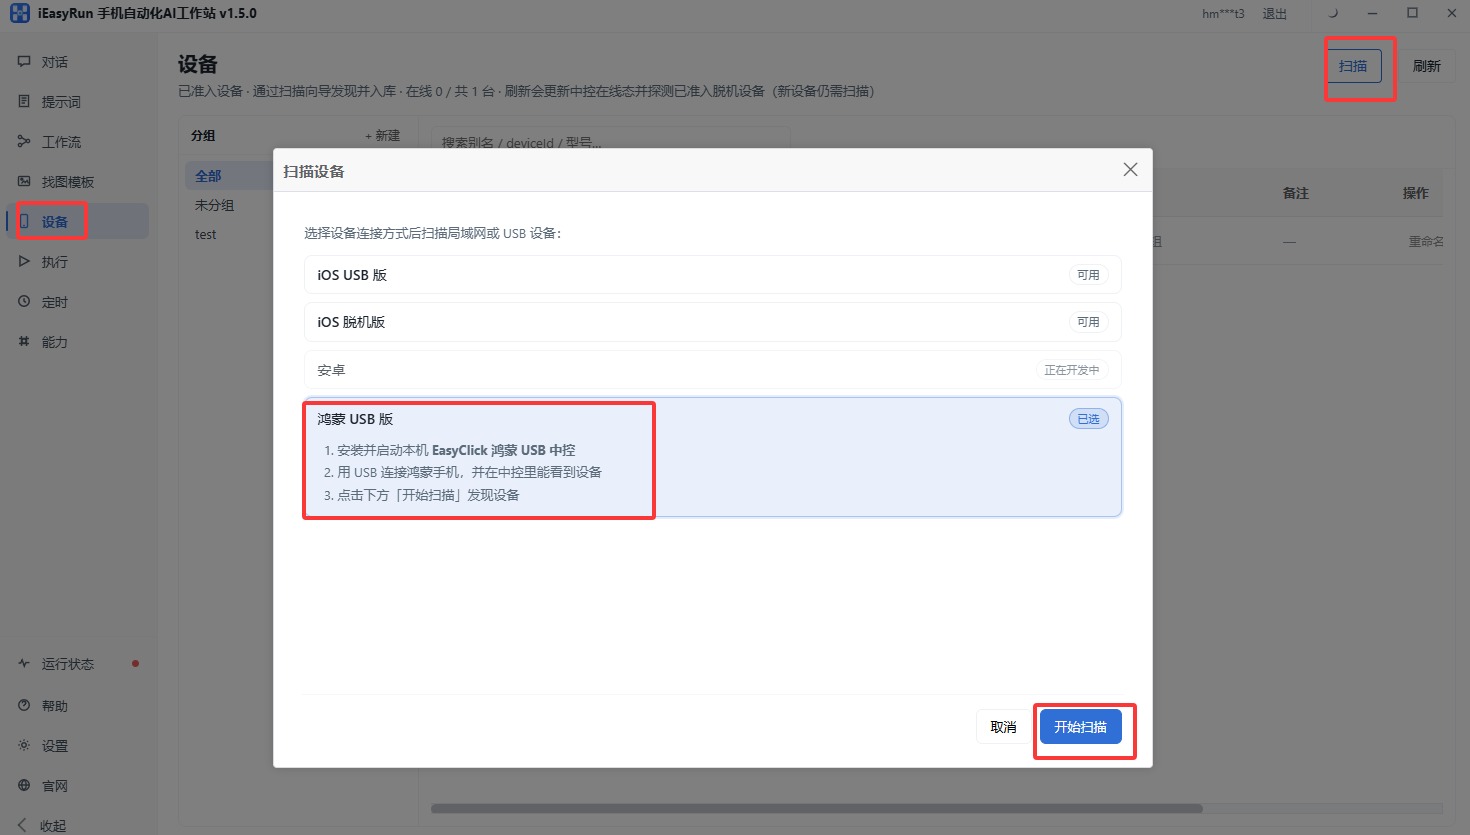
Fig. 11 · Scan as HarmonyOS USB - Step 12
Add the device to the list
Select the found device and add it to the device list. You can rename it or add it to a group later.
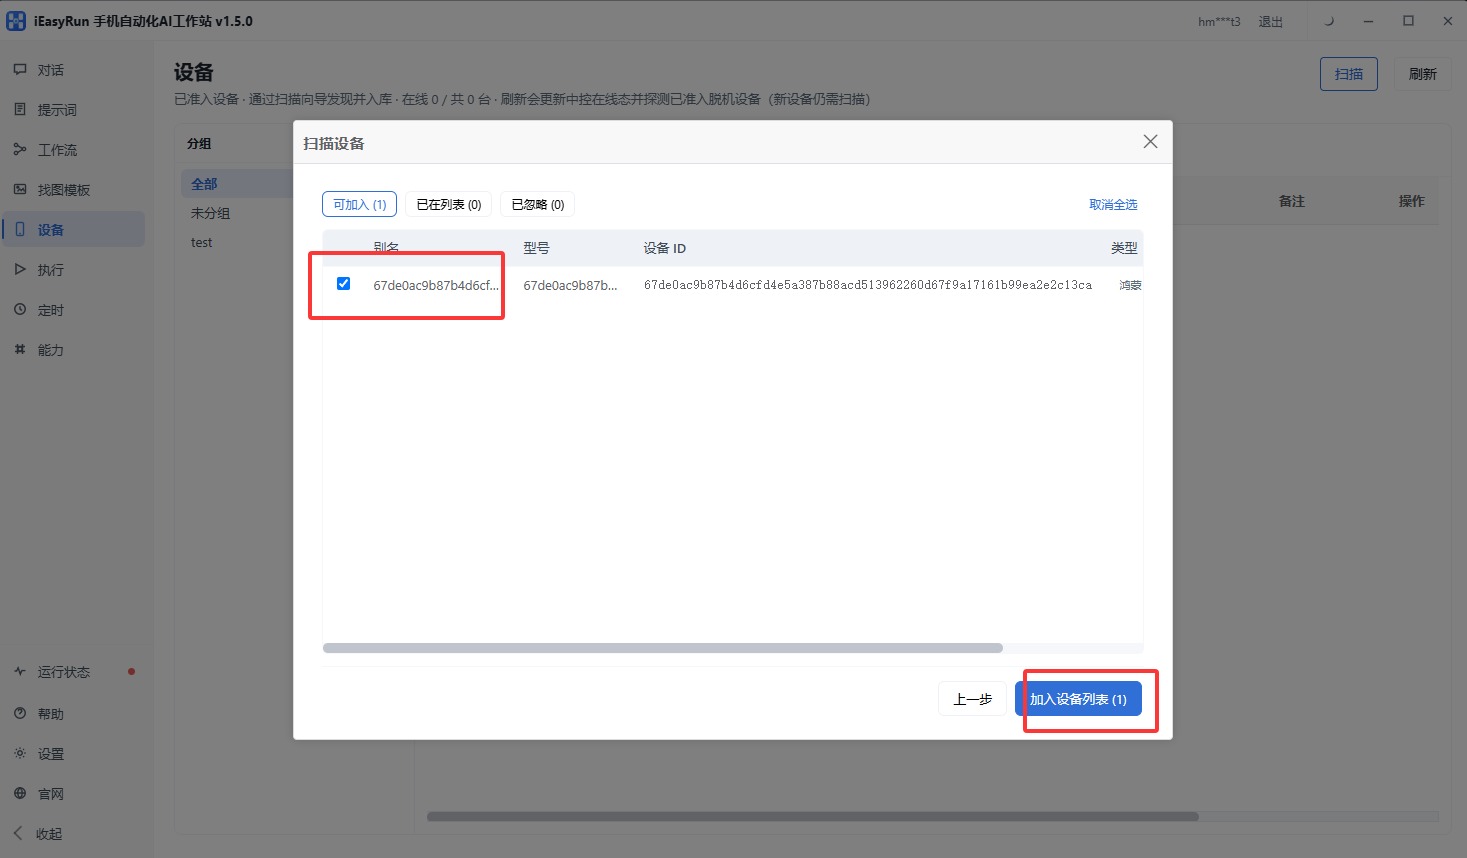
Fig. 12 · Add device to list - Step 13
Configure a model
Open Capabilities, add and save a chat model and a vision model (VLM) (e.g. DeepSeek) so chat can drive the phone.
After that, ask or run tasks in Chat; or open Help in the left sidebar for feature guides and troubleshooting.
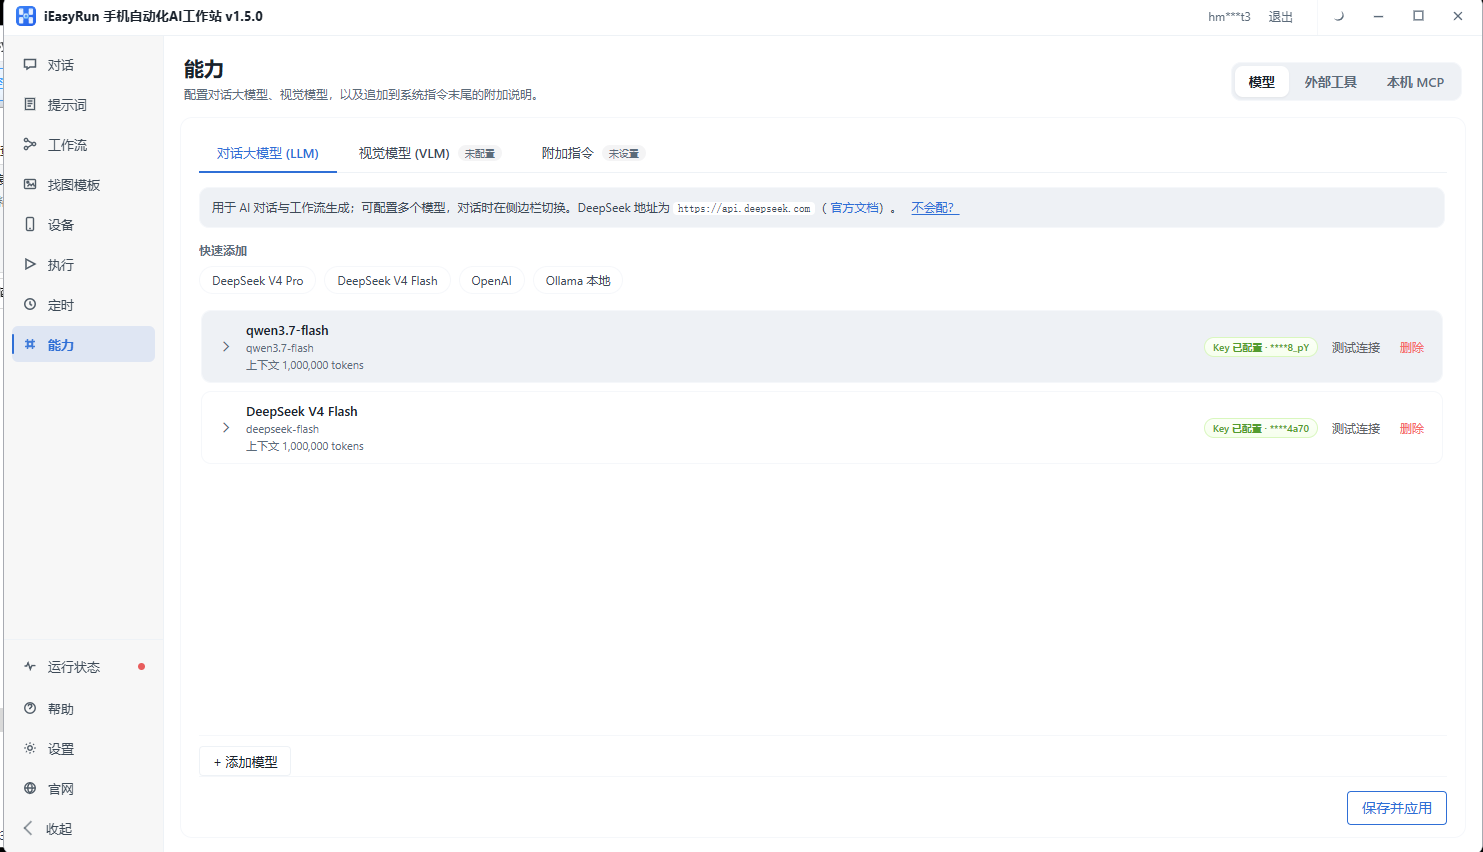
Fig. 13 · Add a model - Step 14
Create a chat and pick HarmonyOS
Open Chat → New chat, name it, select HarmonyOS, then create.
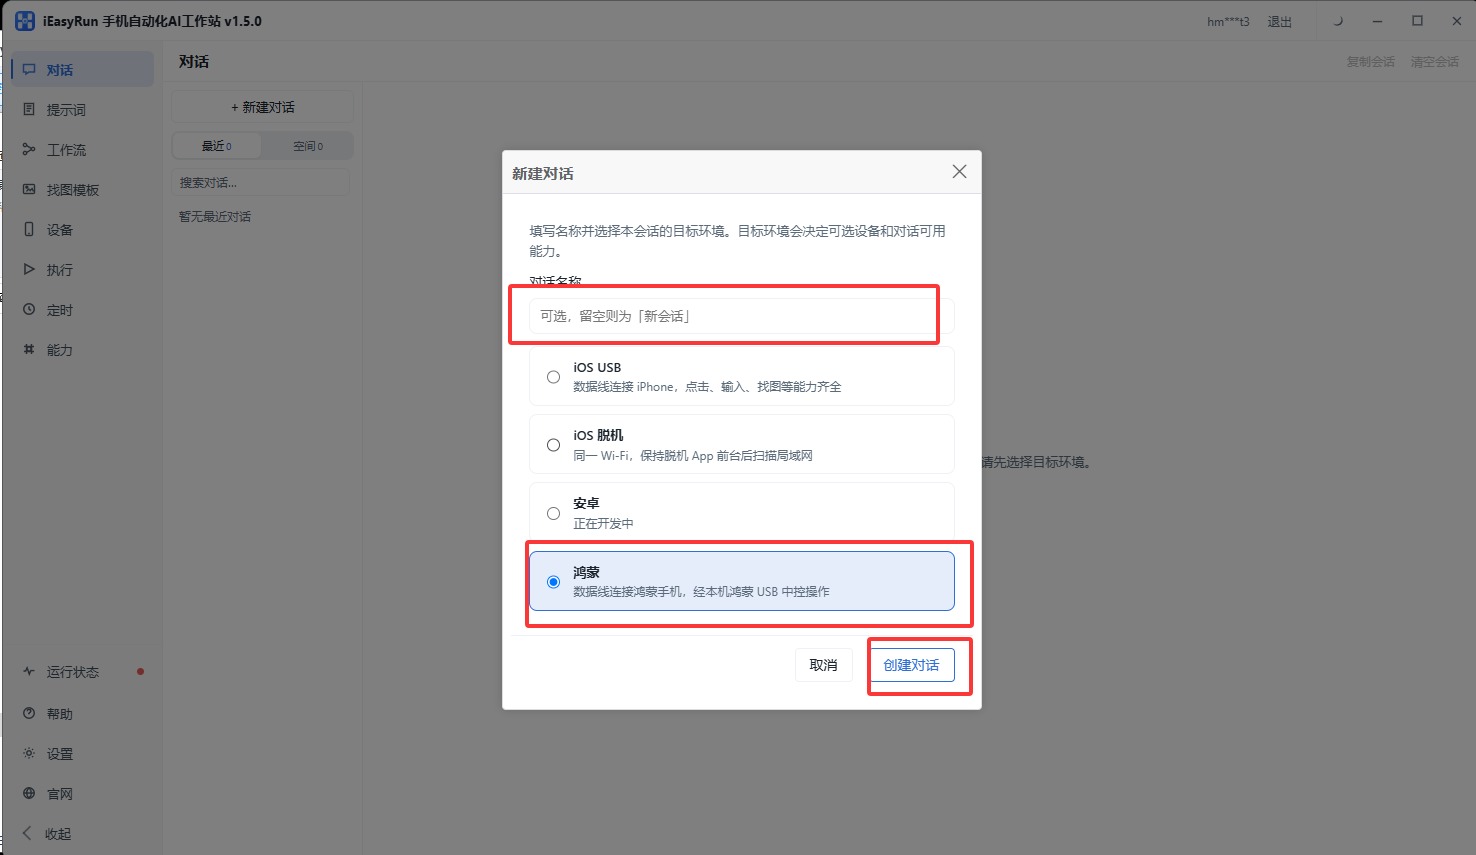
Fig. 14 · New chat · HarmonyOS - Step 15
Refine the request
On the Refine tab, enter a short request and let AI refine it; refine again until it looks right.
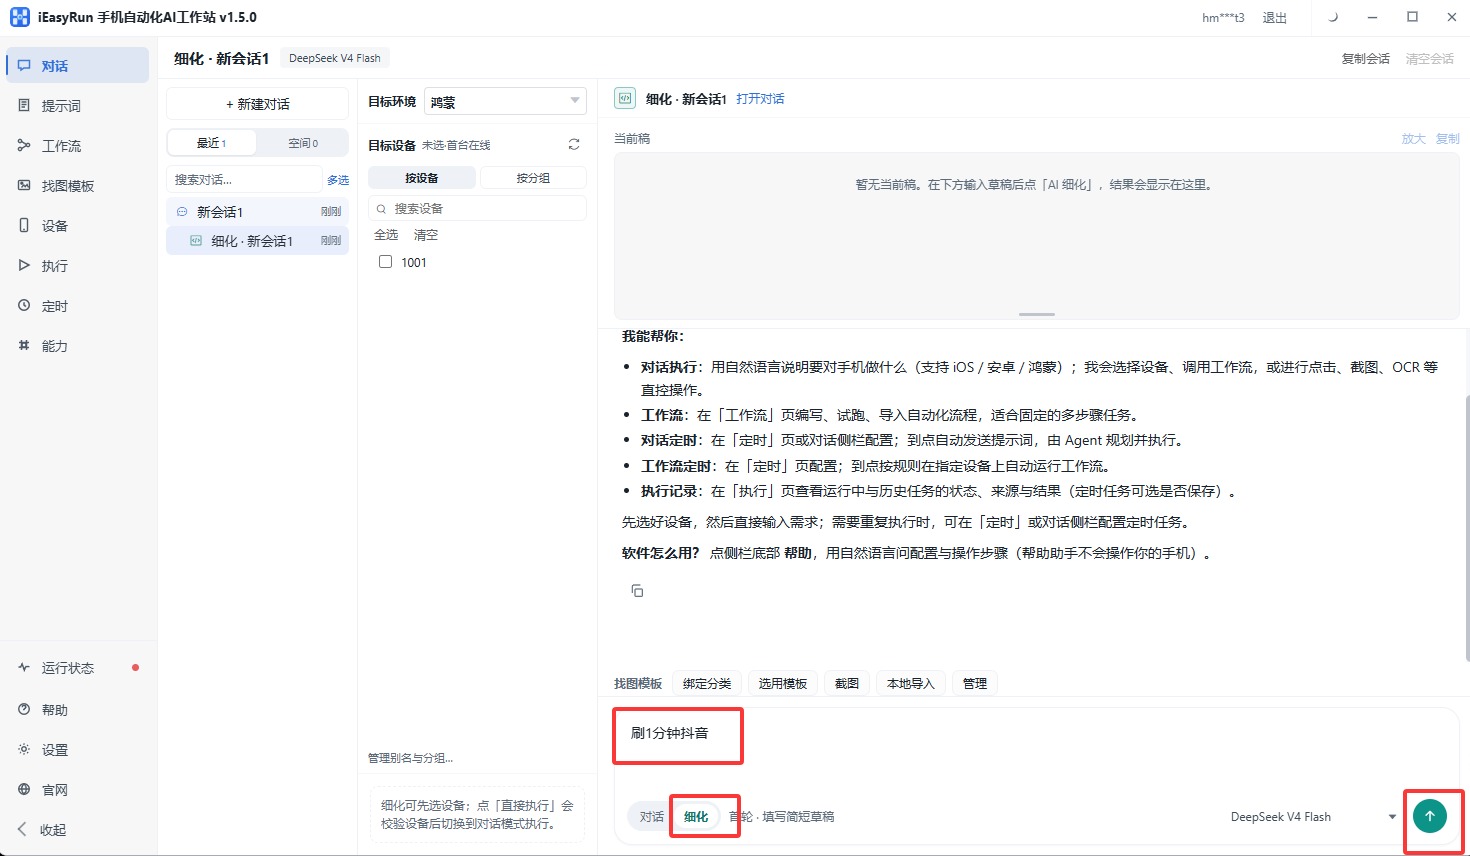
Fig. 15 · Refine the request - Step 16
Run directly
When refine looks good, click Run directly.
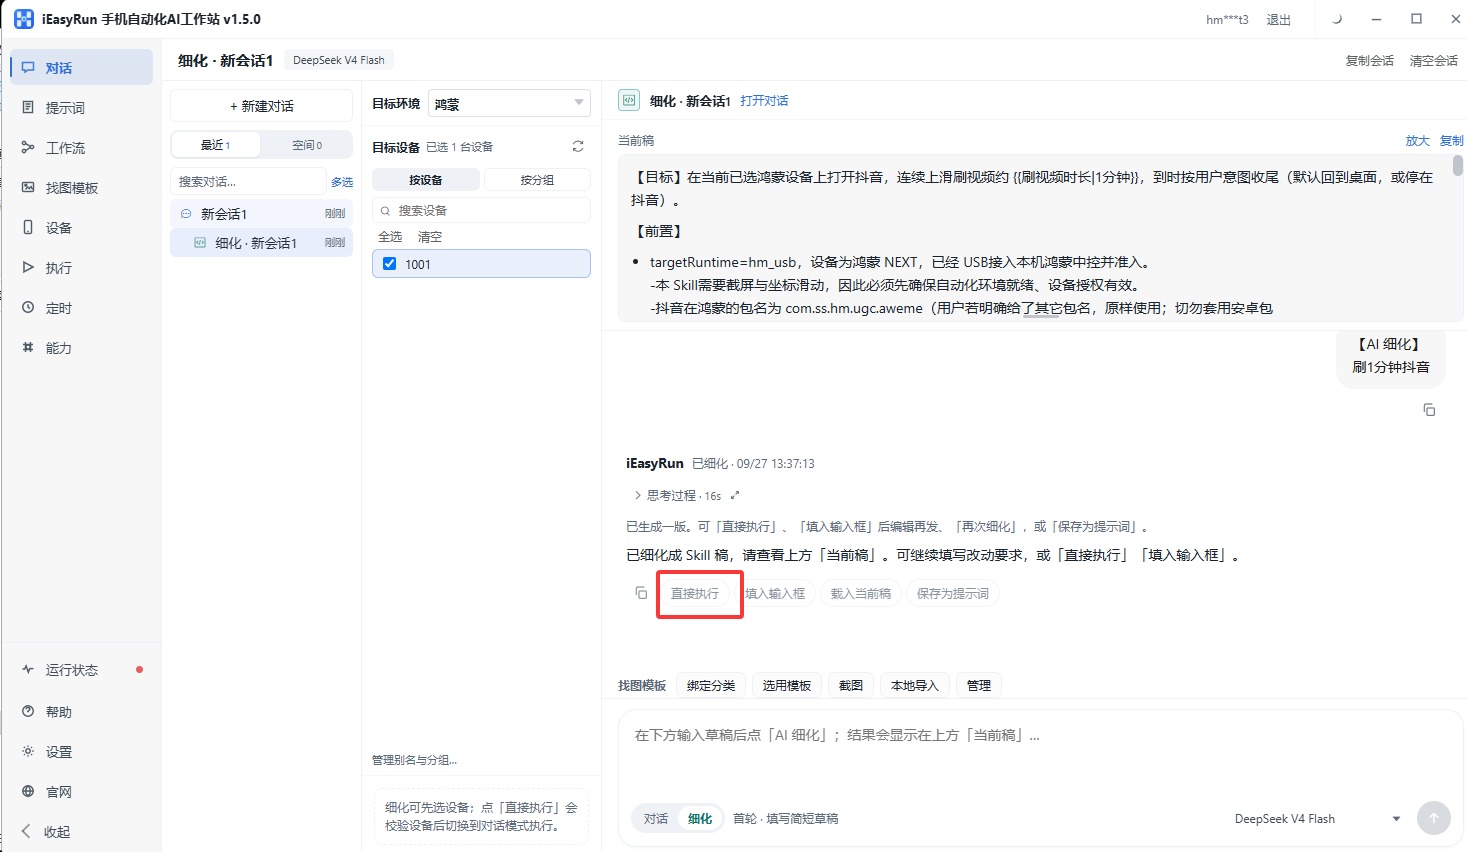
Fig. 16 · Run directly - Step 17
Check the result
Watch progress and results on the page.
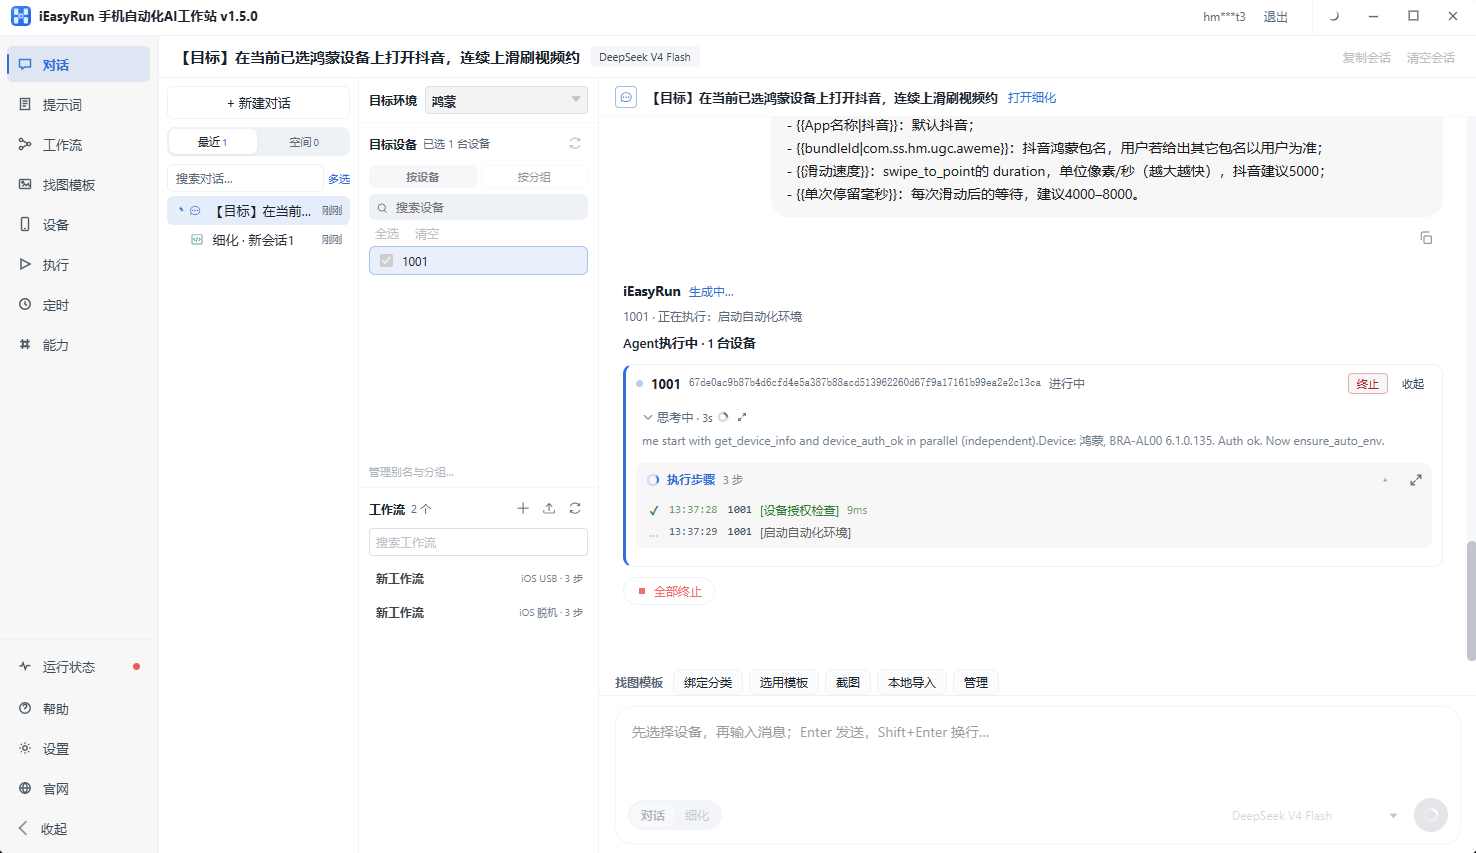
Fig. 17 · Execution result - Step 18
Configure the LLM
After devices are online, configure models in iEasyRun so chat and workflows can understand requests and drive the phone.
Open Capabilities in the left sidebar and set up:
- Chat model: understands your instructions and plans steps (e.g. DeepSeek, Qwen)
- Vision model (VLM): reads screenshots and decides where to tap; it can use a different provider than the chat model
- Fill in the API Key, endpoint, and model name for each, save, then start chatting
After models are configured: ask questions or describe tasks in Chat; or open Help in the left sidebar to look up features, troubleshooting, and how-tos in a help conversation.
- ✓
You’re set — next checks
Center, license, scan, and model are ready. Confirm:
- 新中控.exe signed in; device bound with USB device license; status healthy
- Phone Developer Mode on; center sees the device over USB
- iEasyRun signed in; HarmonyOS device on Devices
- A model is configured under Capabilities
- Chat can select the device and run a simple task; use left-sidebar Help when you need guides